
1. Destpêk
This manual provides detailed instructions for the installation, configuration, and operation of the Intelbras iNVD 5232 32-Channel IP Digital Video Recorder. Please read this manual thoroughly before using the device to ensure proper functionality and to prevent damage.
The Intelbras iNVD 5232 is designed for professional surveillance applications, offering advanced features for recording, monitoring, and managing IP camera feeds.
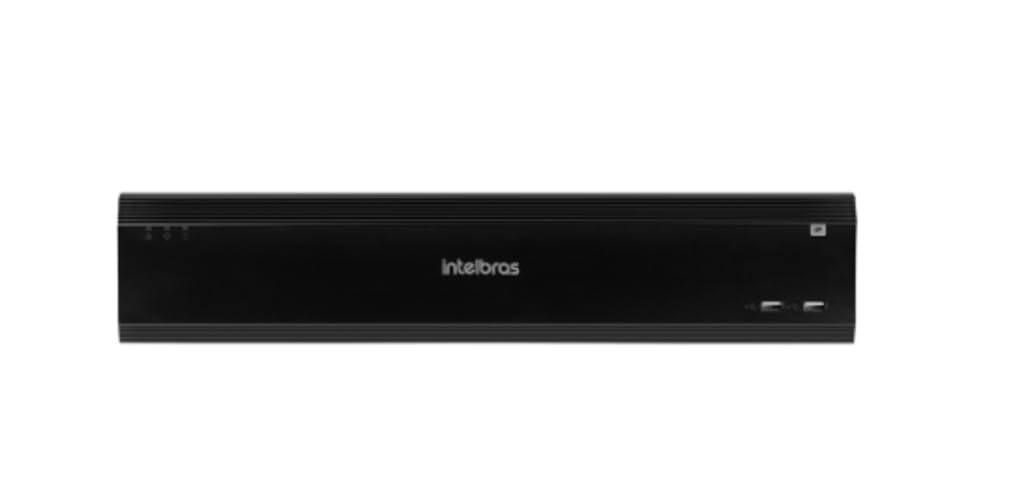
Figure 1: Intelbras iNVD 5232 Digital Video Recorder. This image shows the front panel of the iNVD 5232 unit, featuring a sleek black design with the Intelbras logo and USB ports.
2. Agahiyên Ewlekariyê
Ji bo rêgirtina li birîndarî û zirara li cîhazê, tedbîrên ewlehiyê yên jêrîn bişopînin:
- Pêbaweriya dabînkirina hêzê piştrast bikintage li gorî pêdiviyên cîhazê ye.
- Amûrê li ber şilbûn, baran, an germahiyên zêde nehêlin.
- Ji danîna cîhazê li ber tîrêja tavê ya rasterast an nêzî çavkaniyên germê dûr bixin.
- Amûrê venekin casing. Hemû xizmetguzarî ji karmendên pispor re bişînin.
- Tenê aksesûarên ku ji hêla çêker ve hatine destnîşan kirin bikar bînin.
- Properly ground the device to prevent electrical shock.
3. Naveroka pakêtê
Piştrast bike ku hemî tişt di pakêtê de hene:
- Intelbras iNVD 5232 Digital Video Recorder Unit
- Power Adapter
- Mişka USB
- Vîde ji bo Sazkirina HDD
- Rêbernameya Destpêka Zû
- CD-ROM (containing software and full manual)
4. Hilbera Serîview
4.1 Panela Pêşîn
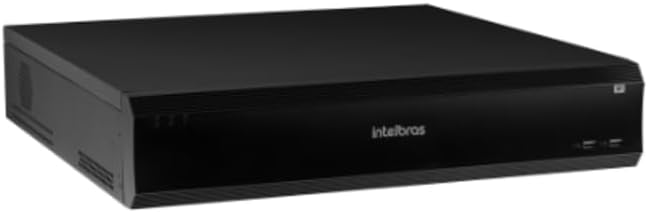
Figure 2: Front Panel of the iNVD 5232. This image displays the front of the DVR, showing LED indicators for power and status, along with two USB ports for peripheral connections.
- Hêza LED: Rewşa hêzê nîşan dide.
- Rewşa LED: Normal rewşa xebitandina sîstemê nîşan dide.
- Portên USB: For connecting a mouse, USB drive, or other peripherals.
4.2 Panela paşîn

Figure 3: Rear Panel of the iNVD 5232. This image details the rear connections, including power input, network ports, video outputs (HDMI, VGA), audio inputs/outputs, and alarm terminals.
- Ketina Hêzê: Adaptora hêzê ya peydakirî ve girêdin.
- Derketina HDMI: Connect to an HDMI-compatible monitor.
- Derketina VGA: Connect to a VGA-compatible monitor.
- Portên LAN: Connect to your network for IP camera communication and remote access.
- Dengê Ketin/Derketin: Ji bo girêdana cîhazên bihîstwerî yên derveyî.
- Alarm In/Out: For connecting external alarm sensors and actuators.
- Portên USB: Portên USB-yê yên zêde ji bo cîhazên derdorê.
5. Sazkirin
5.1 Sazkirina Hardware
- Hard Drive saz bike (eger pêşwext nehatibe sazkirin): DVR c vekeasing, mount the hard drive using the provided screws, and connect the SATA power and data cables.
- Monîtorê Girêdanê Bike: Connect a monitor to the HDMI or VGA output port.
- Mouse Girêdan: Plug the USB mouse into one of the USB ports.
- Tora Têkilî: Connect an Ethernet cable from the LAN port to your network router or switch.
- Hêza girêdanê: Plug the power adapter into the DVR's power input and then into a power outlet. The device will power on automatically.
5.2 Veavakirina Destpêkê
Upon first boot, the system will guide you through an initial setup wizard:
- Hilbijartina Ziman: Zimanê xwe yê bijarte hilbijêrin.
- Sazkirina Şîfreyê: Create a strong administrator password.
- Mîhengên Torê: Configure IP address, subnet mask, gateway, and DNS. DHCP is usually enabled by default.
- Dîrok û Dem: Dîrok, demjimêr û herêma demjimêrê ya rast saz bikin.
- Destpêkirina HDD: Format the installed hard drive for recording.
- IP Camera Search and Add: The system will scan for available IP cameras on the network. Select and add your cameras.
6. Operasyon
6.1 Zindî View
After initial setup, the system will display the live view kamerayên girêdayî. Hûn dikarin di navbera kamerayek yekane de biguherin view, multi-camera grids, and sequence views using the on-screen controls or mouse.
6.2 Rêveberiya Tomarkirinê
- Bernameya tomarkirinê: Configure continuous, motion-detection, or alarm-triggered recording schedules for each camera.
- Tomarkirina bi destan: Initiate recording manually from the live view interface.
- Playback: Gihîştina foo tomarkirîtage by date, time, and event type. Use the playback controls to navigate through recordings.
- Backup: Export recorded video clips to a USB drive or network storage.
6.3 Gihîştina Dûr
The iNVD 5232 supports remote access via a web browser or dedicated mobile application. Ensure your network is configured for remote access (e.g., port forwarding or P2P cloud service activation).
- Web Gerok: Enter the DVR's IP address into a web geroka li ser komputerek ku bi heman torê ve girêdayî ye.
- Serlêdana Mobîl: Download the official Intelbras surveillance app from your device's app store. Scan the QR code on the DVR (if available) or manually enter the device ID for connection.
7. Maintenance
7.1 Paqijkirin
Regularly clean the exterior of the DVR with a soft, dry cloth. Do not use liquid cleaners or aerosols. Ensure ventilation openings are free from dust and obstructions.
7.2 Nûvekirinên Firmware
Periodically check the Intelbras website for firmware updates. Firmware updates can provide new features, performance improvements, and security enhancements. Follow the instructions provided with the firmware update package carefully.
7.3 Rêvebiriya Hard Drive
Monitor the health of your hard drives through the system's HDD management menu. Replace failing drives promptly to avoid data loss. Configure automatic overwriting of old footage ji bo misogerkirina tomarkirina berdewam.
8. Destpêkirin
| Pirsegirêk | Sedema gengaz | Çare |
|---|---|---|
| Hêz tune | Power cable disconnected; faulty power adapter; power outlet issue. | Check power connections; test power adapter; try a different outlet. |
| Derketina vîdyoyê tune | Monitor off/disconnected; incorrect video output settings; faulty cable. | Ensure monitor is on and connected; check video cable; try a different output port or cable. |
| Cannot connect IP cameras | Network issue; incorrect camera IP address/credentials; camera not powered. | Verify network connectivity; ensure cameras are powered and configured correctly; check camera credentials. |
| Tomarkirin tune | HDD not initialized/full; recording schedule not set; camera disconnected. | Initialize HDD; check recording schedule; verify camera connection and status. |
9. Specifications
| Taybetî | Terîf |
|---|---|
| Cins | iNVD 5232 |
| Ketina Vîdyoyê | 32 Kanalên IP |
| Derketina Vîdyoyê | 1 HDMI, 1 VGA |
| Input/Derketina Deng | Specific ports (e.g., RCA) |
| Resolution Recording | Up to 8MP (depending on camera) |
| Playback Capability | Multi-channel synchronous playback |
| Embarkirinî | Multiple SATA HDD bays (HDDs not included) |
| Têkiliya torê | Lîmanên Gigabit Ethernet |
| Navrûya USB | Portên USB 2.0/3.0 |
| Navê min | DC 12V (adapter included) |
| Germahiya xebitandinê | 0°C heta 50°C (32°F heta 122°F) |
10. Garantî û Piştgirî
For warranty information, please refer to the warranty card included with your product or visit the official Intelbras website. Technical support is available through Intelbras authorized service centers and online resources.
Intelbras Official Webmalper: www.intelbras.com.br
Ji kerema xwe dema ku hûn bi piştgiriyê re têkilî datînin, modela hilberê û jimareya seriyê ya hilberê xwe amade bikin.