BlitzWolf BW-VT2EU
Pirtûka Bikarhêner a Projektorê Mini BlitzWolf BW-VT2
Your comprehensive guide to setting up, operating, and maintaining your BlitzWolf BW-VT2 Mini Projector.
1. Hilbera Serîview
1.1 Naveroka pakêtê
Ji kerema xwe piştrast bikin ku hemî tişt di pakêta we de hene:
- BlitzWolf BW-VT2 Mini Projector
- Remote Control
- Power Adapter
- Cable HDMI
- Manual Bikarhêner (ev belge)
1.2 Layout Device
Familiarize yourself with the various parts and ports of your projector.
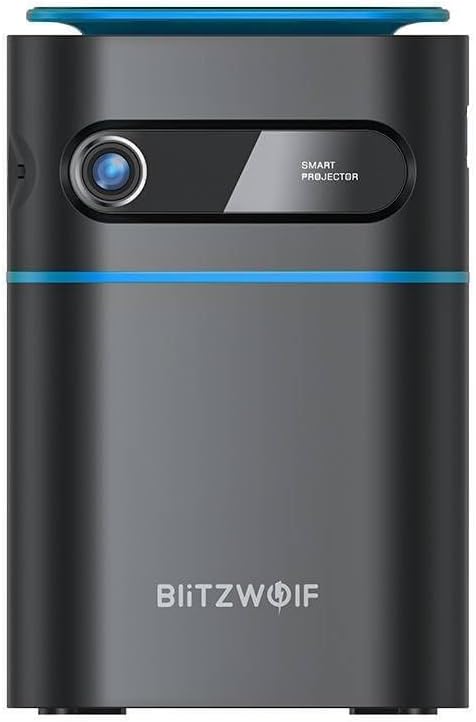
Wêne 1.1: Pêşî View. This image displays the front of the BlitzWolf BW-VT2 Mini Projector, highlighting the projection lens and the 'SMART PROJECTOR' branding.

Figure 1.2: Projector with Remote Control. This image shows the BlitzWolf BW-VT2 Mini Projector alongside its dedicated remote control, illustrating the compact size of both devices.
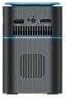
jimar 1.3: Paş View. The rear of the projector is shown, featuring ventilation grilles and various input/output ports.

Wêne 1.4: Alî View. This image highlights the side of the projector where additional connectivity options such as USB and HDMI ports are located.

Wêne 1.5: Ser View. The top surface of the projector is visible, featuring the integrated touch control panel for direct interaction.
1.3 Port û Kontrol
- Port HDMI: Connect to laptops, game consoles, Blu-ray players, etc.
- Porta USB: Ji bo lîstina medyayê ajokarên flash ên USB-yê ve girêdin.
- Porta Derketina Deng (3.5mm): Guhdarok an axaftvanên derveyî ve girêdin.
- DC IN Port: Adapterê hêzê girêdin.
- Bişkojka Hêzê: Projektorê vedike/dixe.
- Wheel Focus: Zelaliya wêneyê sererast dike.
- Panela Kontrolê ya Têkilî: Navigate menus and control playback directly on the device.
2. Guide Setup
2.1 Hêzdarkirin
- Adaptora hêzê bi porta DC IN ya li ser projektorê ve girêdin.
- Adaptera elektrîkê têxin hêlîneke dîwêr.
- Press and hold the Power Button on the projector or the remote control until the device powers on.
2.2 Cihgirtina Destpêkê
Ji bo çêtirîn viewing experience, consider the following:
- Projektorê li ser rûyekî sabît û dûz bi cîh bikin.
- Ensure there is adequate ventilation around the projector to prevent overheating.
- Position the projector perpendicular to the projection surface (wall or screen) for a rectangular image.
- Adjust the distance to achieve your desired screen size.
2.3 Eyarkirina Focus
After powering on, adjust the focus to ensure a clear image:
- Çerxa fokusê ya li nêzî lensê bizivirîne heta ku wêneya projeyî tûj û zelal xuya bibe.
2.4 Setup Control Remote
Insert batteries into the remote control before first use:
- Li ser pişta kontrolê ya ji dûr ve qapa beşa pîlê vekin.
- Insert two AAA batteries (not included), ensuring correct polarity (+/-).
- Qepaxa beşa pîlê bigire.
3. Telîmatên Operating
3.1 Navîgasyon
You can navigate the projector's interface using either the remote control or the touch control panel on top of the device.
- Kontrola dûr: Use the directional buttons (up, down, left, right) to move through menus and the 'OK' button to select.
- Panela Kontrolê ya Têkilî: Swipe and tap on the touch-sensitive surface to navigate.
3.2 Girêdana Amûrên
The BW-VT2 supports various input sources:
- Têketina HDMI: Connect your laptop, game console, or other HDMI-enabled devices using an HDMI cable. Select the HDMI input source from the projector's menu.
- Têketina USB: Insert a USB flash drive into the USB port. The projector's media player will typically detect the drive automatically, allowing you to browse and play supported media files (videos, photos, music).
- Têkiliya Wi-Fi: Navigate to the 'Settings' menu, then 'Network' or 'Wi-Fi'. Select your Wi-Fi network and enter the password to connect the projector to the internet. This enables access to online streaming apps and updates.
3.3 Android OS Features
As an Android-powered projector, the BW-VT2 offers smart functionalities:
- Gihîştina Appê: Download and install various streaming apps (e.g., Netflix, YouTube) directly from the pre-installed app store or by sideloading APKs.
- Mîhengan: Customize display settings, audio output, network configurations, and system preferences through the Android settings menu.
- Mirroring Screen: Utilize built-in screen mirroring features (e.g., Miracast, AirPlay compatible apps) to project content from your smartphone or tablet wirelessly.
3.4 Output Audio
The projector has built-in speakers, but you can also connect external audio devices:
- Derketina Dengê 3.5mm: Connect headphones or external speakers via the 3.5mm audio jack for enhanced sound.
4. Maintenance
Parastina rast temenê dirêj û performansa çêtirîn a projektorê we misoger dike.
4.1 Paqijkirina Lensê
To maintain clear image quality, clean the projector lens regularly:
- Qumaşek nerm û bêlîf bikar bînin ku bi taybetî ji bo lensên optîkî hatiye çêkirin.
- Lensê bi nermî bi tevgerên dorhêlî paqij bikin.
- Avoid using abrasive cleaners or excessive force, which can scratch the lens.
4.2 Avêtin
Ensure proper airflow to prevent overheating:
- Do not block the ventilation vents on the projector.
- Projektorê li cîhekî baş hewakirî bixebitînin.
- Periodically clean dust from the vents using a soft brush or compressed air.
4.3 Storage
When not in use, store your projector properly:
- Store the projector in a cool, dry place, away from direct sunlight and extreme temperatures.
- Use the original packaging or a protective case to prevent dust accumulation and physical damage.
5. Destpêkirin
Ji bo pirsgirêkên hevpar û çareseriyên wan li vê beşê binêre.
| Pirsegirêk | Sedema gengaz | Çare |
|---|---|---|
| Projektor vênake. | Girêdana elektrîkê tune; adaptora elektrîkê xera ye. | Piştrast bike ku adaptora hêzê bi ewlehî hem bi projektorê û hem jî bi prizê ve girêdayî ye. Prizek cûda biceribîne. |
| Wêneyek nehatiye pêşandan. | Incorrect input source selected; loose HDMI/USB cable. | Verify the correct input source is selected in the menu. Check cable connections. |
| Wêne nezelal e. | Focus not adjusted; projector too close/far. | Rotate the focus wheel until the image is clear. Adjust projection distance if necessary. |
| Deng tune. | Volume too low; external audio device not connected properly. | Increase volume. Check connections to external speakers/headphones. Ensure audio output is set correctly in settings. |
| Pirsgirêkên girêdana Wi-Fi. | Şîfreya şaş; pirsgirêkên routerê; destwerdana sînyalê. | Re-enter Wi-Fi password. Restart router. Move projector closer to router. |
| Kontrola ji dûr ve naxebite. | Pîlên bateriyê mirî ne; astengî; dûrveger ne girêdayî ye. | Replace batteries. Ensure no obstruction between remote and projector. |
6. Specifications Teknîkî
Key specifications of the BlitzWolf BW-VT2 Mini Projector:
| Taybetî | Specification |
|---|---|
| Nîşan | BlitzWolf |
| Hejmara Model | BW-VT2EU |
| Reng | Reş |
| Teknolojiya Girêdanê | HDMI, USB, VGA, Wi-Fi |
| Resolution Display | 1920 x 1080 (Tevahiya HD) |
| Type Display | LCD, LED |
| Faktora Form | Cîtêgûherr |
| Taybetmendiyên Taybet | Portable, Android OS, Wi-Fi, HDMI, USB, VGA |
| Amûrên Lihevhatî | Laptops, Smartphones, Game Consoles, Blu-ray Players, Media Players, Wi-Fi enabled devices |
| Bikaranîna Pêşniyar kirin | Sînemaya Malê |
7. Garantî û Piştgirî
7.1 Garantiya Hilberîner
The BlitzWolf BW-VT2 Mini Projector comes with a Garantiya çêker a 2 salîEv garantî kêmasiyên materyal û karîgeriyê di bin karanîna normal de vedihewîne. Ji kerema xwe delîla kirînê ji bo îdîayên garantiyê biparêzin.
7.2 Piştgiriya Mişterî
If you encounter issues not covered in the troubleshooting section or require further assistance, please contact BlitzWolf customer support. Refer to the product packaging or the official BlitzWolf webmalper ji bo agahdariya têkiliyê ya herî nûjen.
Ask a question about this manual
Ask about setup, troubleshooting, compatibility, parts, safety, or missing instructions. Manuals+ will review the question and use this page’s manual context to help answer it.