
1. Destpêk
Thank you for choosing the Parrot Uncle F8259 13-inch flush mount caged ceiling fan. This manual provides detailed instructions for the safe installation, operation, and maintenance of your new ceiling fan. Please read this manual thoroughly before installation and retain it for future reference. This fan is designed for indoor use in small spaces such as bedrooms and bathrooms, offering both air circulation and lighting.
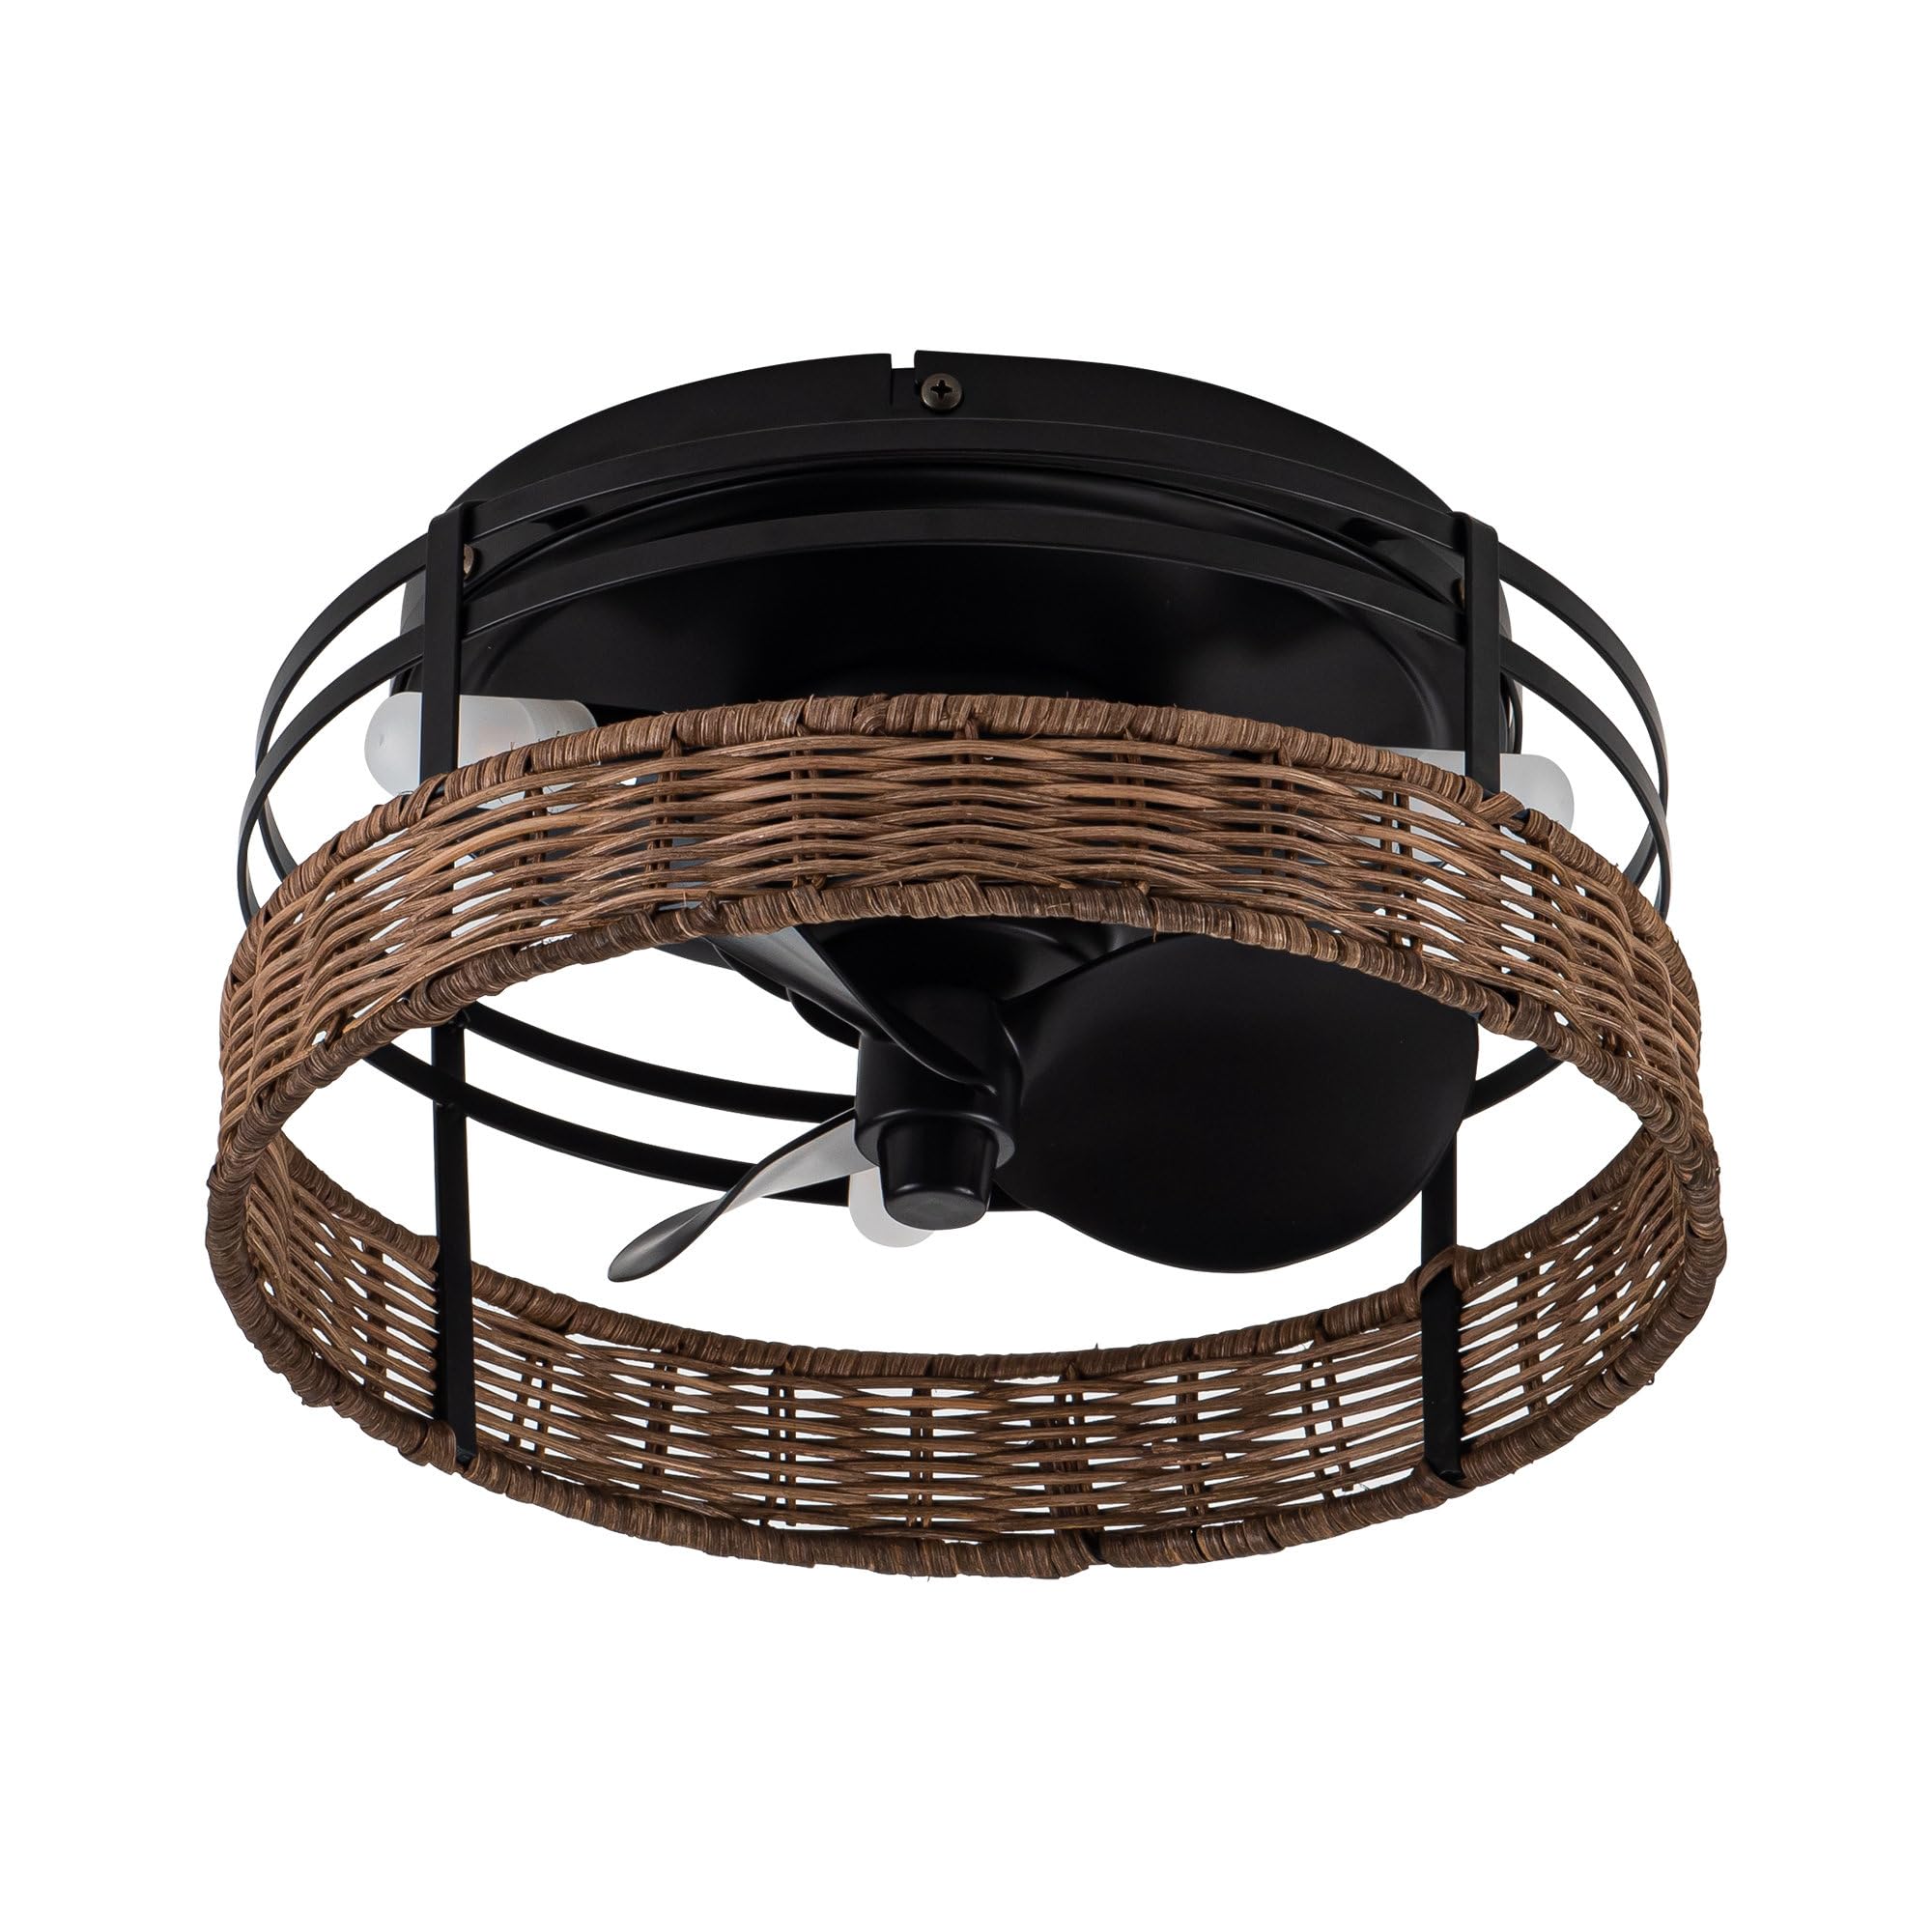
Image 1.1: The Parrot Uncle F8259 ceiling fan with lights, showcasing its rustic design in a home setting.
2. Agahiyên Ewlekariyê
- Hemî rêwerzan bixwînin: Before beginning installation, read all instructions and safety information.
- Ewlehiya Elektrîkê: All electrical wiring must be performed by a qualified electrician or a person with electrical experience. Ensure the power is turned off at the circuit breaker before installation or servicing.
- Çêkirin: Divê avahiya montajê bikaribe giraniya fanê (bi qasî 5.07 lbs) hilgire.
- Valahiya kêrê: Ensure there is adequate clearance from the fan blades to any obstructions.
- Tîpa ampûlê: Use only G9 bulbs as specified. Do not exceed the maximum wattage.
- Tenê karanîna hundurîn: This fan is designed for indoor use and is not water resistant. Do not install in outdoor or damp cihên.
- Kontrola dûr: Keep the remote control away from children. Batteries are required for the remote (not included).
3. Naveroka pakêtê
Verify that all components are present before beginning installation. If any parts are missing or damaged, contact customer service.
- Ceiling Fan Unit (Motor, Blades, Caged Housing)
- Bracket
- Remote Control
- G9 Light Bulbs (3 included)
- Pakêta Amûrên Bikaranînê (vîd, gwîzên têl, hwd.)
- Manual Instruction
4. Specifications
| Taybetî | Specification |
|---|---|
| Hejmara Model | F8259 |
| Mezinahiya Giştî | 12.5" Diameter x 6.3" Bilindahî |
| Diameter Canopy | 9.5" |
| Pîvan | 5.07 lîre |
| Blades | 3 kêrên ABS |
| Motor Max Speed | 1100 RPM |
| Kapasîteya herikîna hewayê | 800 Fet Kubic Per Minute (CFM) |
| Çavkaniya Ronahî | 3 x G9 Bulbs (Max 2 Watts each, 1500 Lumens total) |
| Voltage | 120 Volt |
| Rêbaza Kontrolê | Remote Control (RF) |
| Taybetmendiyên Taybet | Remote Controlled, Reversible Motor |
| Cureyê Sazkirinê | Flush Mount |
| Mal | Hesin, Acrylonitrile Butadiene Styrene (ABS) |
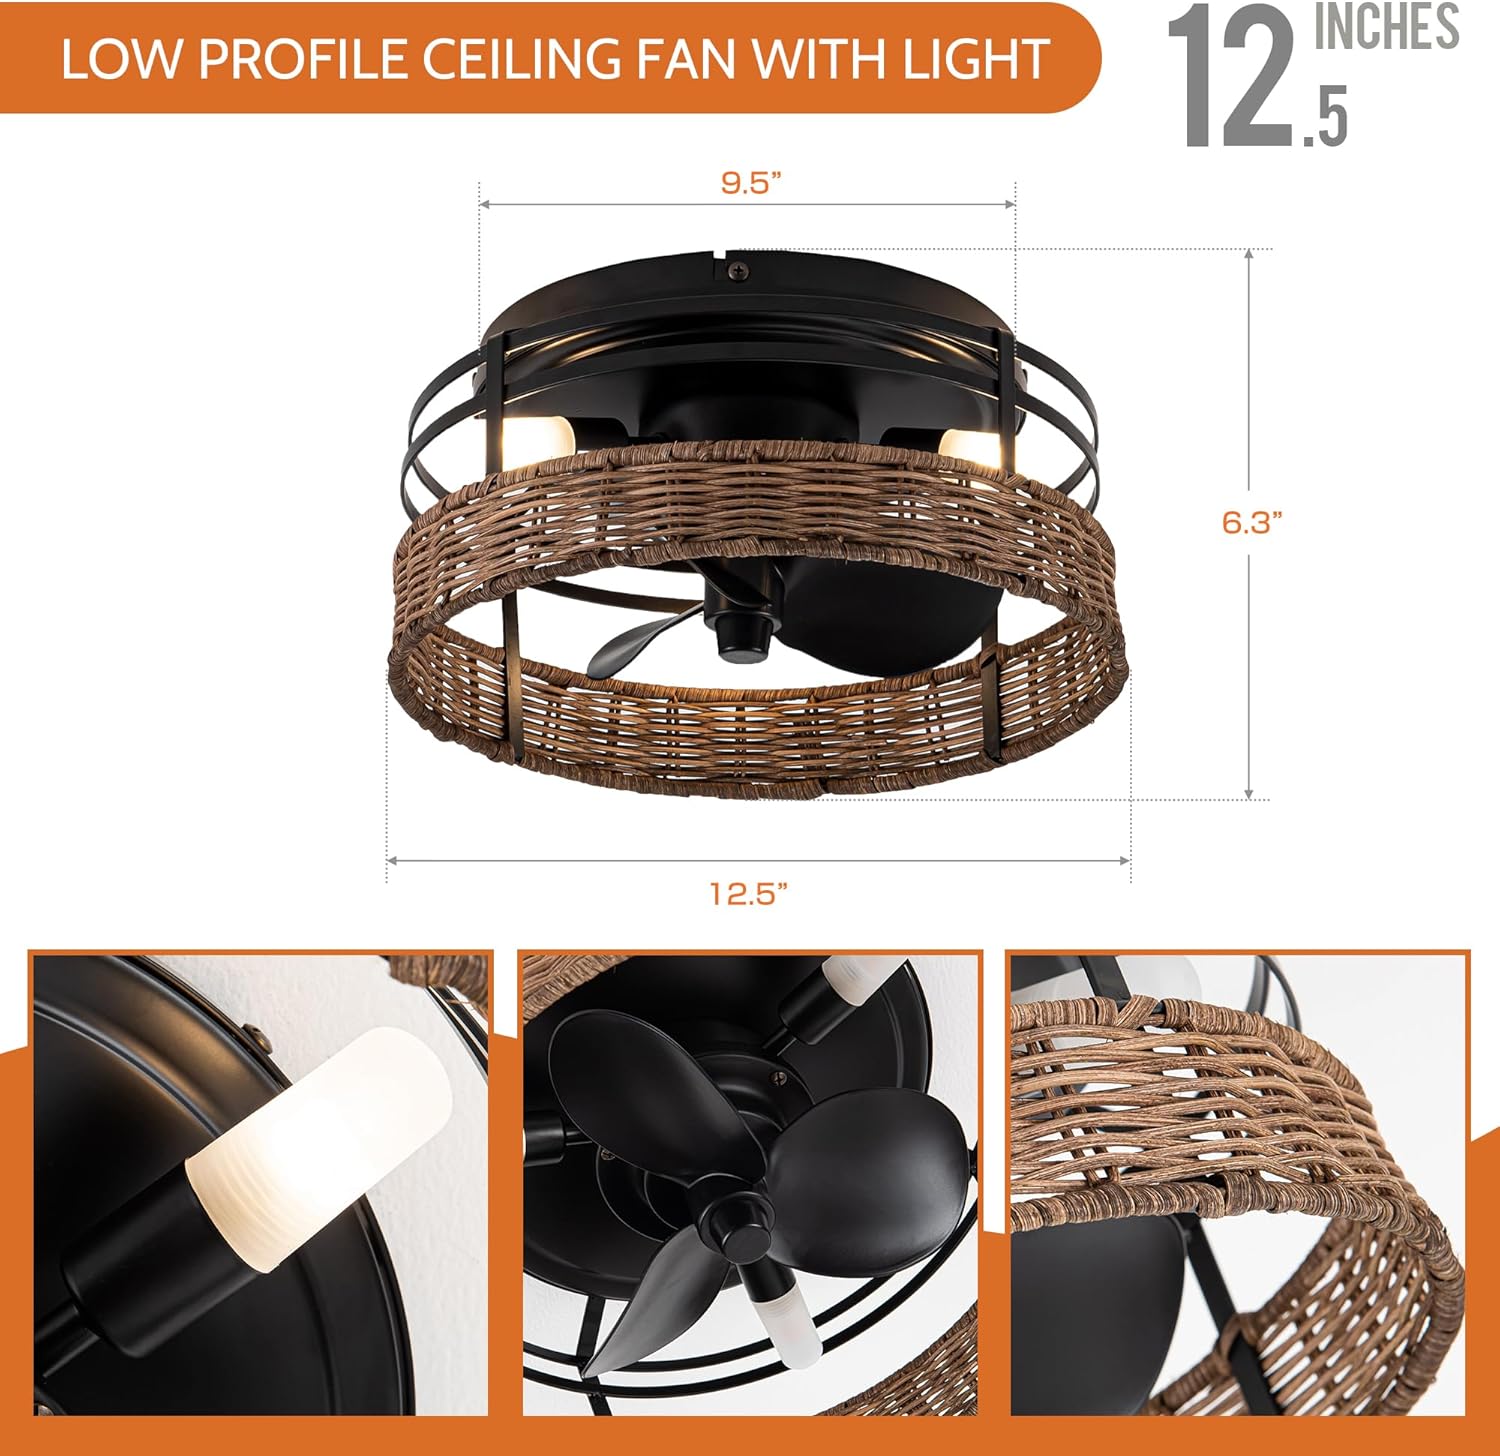
Image 4.1: Product dimensions, including 12.5 inches diameter and 6.3 inches height.
5. Sazkirin
Berî ku hûn dest pê bikin: Ensure power is disconnected at the circuit breaker. Consult a qualified electrician if you are unsure about wiring.
- Cihê Mountkirinê amade bikin: Piştrast bike ku qutiya elektrîkê bi ewlehî li avahiya avahiyê hatiye danîn û dikare giraniya fanosê hilgire.
- Bişkojka Mountkirinê ve girêdin: Secure the mounting bracket to the electrical box using the provided screws.
- Têkiliyên Têlê: Connect the fan's electrical wires to the household wiring according to local electrical codes. Typically, this involves connecting live, neutral, and ground wires. Use wire nuts to secure connections.
- Çiyayê Fan: Carefully lift the fan unit and attach it to the mounting bracket. Ensure all screws are tightened securely.
- Lampên Ronahî saz bikin: Insert the three G9 bulbs into their sockets.
- Kontrola dawî: Berî ku ceyran ji nû ve bidin destpêkirin, hemû girêdan du caran kontrol bikin û piştrast bikin ku fan bi ewlehî hatiye danîn.


6. Telîmatên Operating
Your Parrot Uncle F8259 ceiling fan is operated using the included remote control. Ensure batteries are installed in the remote (2 x AAA batteries, not included).
6.1 Fonksiyonên Kontrola Dûr

Wêne 6.1: Şêwe û fonksiyonên kontrola ji dûr ve.
- Leza Fanê (1-3): Press buttons '1', '2', or '3' to select low, medium, or high fan speed.
- Rawestandina Fan: Press the 'STOP' button to turn off the fan.
- Pêş / Berepaş: Press this button to change the fan's rotation direction (clockwise or counter-clockwise).
- Ronahî Ronahî / Vemirandin: Ji bo vêxistin an jî vemirandina ronahiyê, bişkoja îkona ampûlê bikirtînin.
- All On/Off: Press the power button to turn both the fan and light on or off simultaneously.
6.2 Fonksiyona Motorê ya Berevajîkirî
The fan features a reversible motor for year-round comfort. Use the 'Forward / Reverse' button on the remote to switch modes.
- Moda Havînê (Zivistana li dijî saetê): The fan blades rotate counter-clockwise, pushing air downwards to create a cooling breeze.
- Moda Zivistanê (Bizivirîna saetê): The fan blades rotate clockwise, drawing air upwards to circulate warm air trapped near the ceiling, helping to distribute heat more evenly.

Image 6.2: Airflow patterns for reversible motor function in summer and winter.
7. Maintenance
Parastina birêkûpêk performansa çêtirîn misoger dike û temenê fanosa banê we dirêj dike.
- Paqijî: Fanê bi awayekî periyodîk bi nermî paqij bikinamp qumaş. Paqijker an çareserkerên aşınker bikar neynin, ji ber ku ew dikarin zirarê bidin rûpûşê. Berî paqijkirinê piştrast bikin ku elektrîk qut bûye.
- Guhertina Bulb: To replace G9 bulbs, ensure the power is off and the bulbs have cooled. Carefully remove the old bulb and insert a new G9 bulb of the same type and wattage (Max 2W).
- Girêdan hişk bikin: Hemû pêç û girêkên li ser fan û alavên montajê bi awayekî periyodîk kontrol bikin da ku piştrast bibin ku ew bi ewlehî ne.
8. Destpêkirin
Heke hûn bi fanosa xwe re pirsgirêkan bibînin, li pirsgirêk û çareseriyên hevpar ên jêrîn binêrin:
| Pirsegirêk | Sedema gengaz | Çare |
|---|---|---|
| Fan dest pê nake | Ceyran nagihîje fanê; Girêdanên têlan sist in; Pîla kontrolê ya ji dûr ve xilas bûye. | Sîkkera devreyê kontrol bike; Piştrast bike ku hemû girêdanên têlan ewle ne; Pîlên kontrola dûr biguherînin. |
| Ronahî naxebite | Bulb is faulty; Loose wire connection; Remote control battery dead. | Replace G9 bulb; Check light fixture wiring; Replace remote control batteries. |
| Kontrola ji dûr ve naxebite | Pîl mirî ne an jî bi xeletî hatine danîn; Kêmderzî ne girêdayî ye (eger hebe). | Replace batteries (2 x AAA); Ensure batteries are inserted correctly; Refer to remote pairing instructions (if provided separately). |
| Lihevhatina zêde | Loose mounting screws; Fan not securely attached to mounting bracket. | Ensure all mounting screws are tight; Verify fan is properly seated on the mounting bracket. |
9. Garantî û Piştgirî
This Parrot Uncle ceiling fan comes with a limited warranty. For specific warranty details, claims, or technical support, please contact Parrot Uncle customer service directly. Keep your purchase receipt as proof of purchase.
Agahiyên Têkilî: Please refer to the contact information provided with your purchase or visit the official Parrot Uncle webmalpera ji bo piştgirî.