1. Destpêk
Thank you for choosing the Baseus A2 Pro Handheld Vacuum Cleaner. This compact and powerful cordless vacuum is designed for efficient cleaning in various environments, from your car to your home or office. Its lightweight design, strong suction, and versatile attachments make it an ideal tool for quick clean-ups and reaching tight spaces. Please read this manual thoroughly before use to ensure proper operation and maintenance.
2. Çi di Qutîkê de ye
Your Baseus A2 Pro package includes the following components:
- Baseus A2 Pro Handheld Vacuum Cleaner Unit
- 2-in-1 Brush and Crevice Nozzle
- Blower Nozzle
- Kabloya barkirinê ya USB-C
- Manual Bikarhêner

Figure 2.1: Baseus A2 Pro Handheld Vacuum Cleaner with included accessories.
3. Hilbera Serîview
Familiarize yourself with the components of your Baseus A2 Pro vacuum cleaner:
- Yekîneya Sereke: Bişkokên motor, pîl û kontrolê dihewîne.
- Kasa tozê: Transparent compartment for collecting debris.
- Parzûna HEPA: Located inside the dust cup, filters fine particles.
- Bişkojka Hêzê: Paqijkerê vedike/digire.
- Bişkojka Modê: Adjusts suction power levels.
- Porta barkirinê ya USB-C: Ji bo ji nû ve şarjkirina bataryaya navxweyî.
- Nozûla 2-di-1ê de: Features a brush for agitation and a crevice tool for narrow gaps.
- Blower Nozzle: Attaches to the exhaust port for blowing dust.

Figure 3.1: Close-up of the versatile 2-in-1 nozzle and the blower nozzle.
4. Sazkirin
4.1 Civîn
- Ensure the HEPA filter is correctly seated inside the transparent dust cup.
- Align the dust cup with the main unit and twist clockwise until it locks securely into place.
- Attach the desired nozzle (2-in-1 or blower) to the appropriate port. For vacuuming, attach the 2-in-1 nozzle to the suction inlet. For blowing, attach the blower nozzle to the exhaust port at the rear of the unit.
4.2 Barkirin
Berî bikaranîna pêşîn, paqijkera valahiyê bi tevahî şarj bikin.
- Connect the USB-C charging cable to the charging port on the vacuum cleaner.
- Plug the other end of the USB-C cable into a compatible 5V/2A USB power adapter (not included) or a car USB port.
- The charging indicator light will illuminate during charging. A full charge typically takes approximately 3-4 hours.
- Once fully charged, the indicator light may change color or turn off, depending on the model.
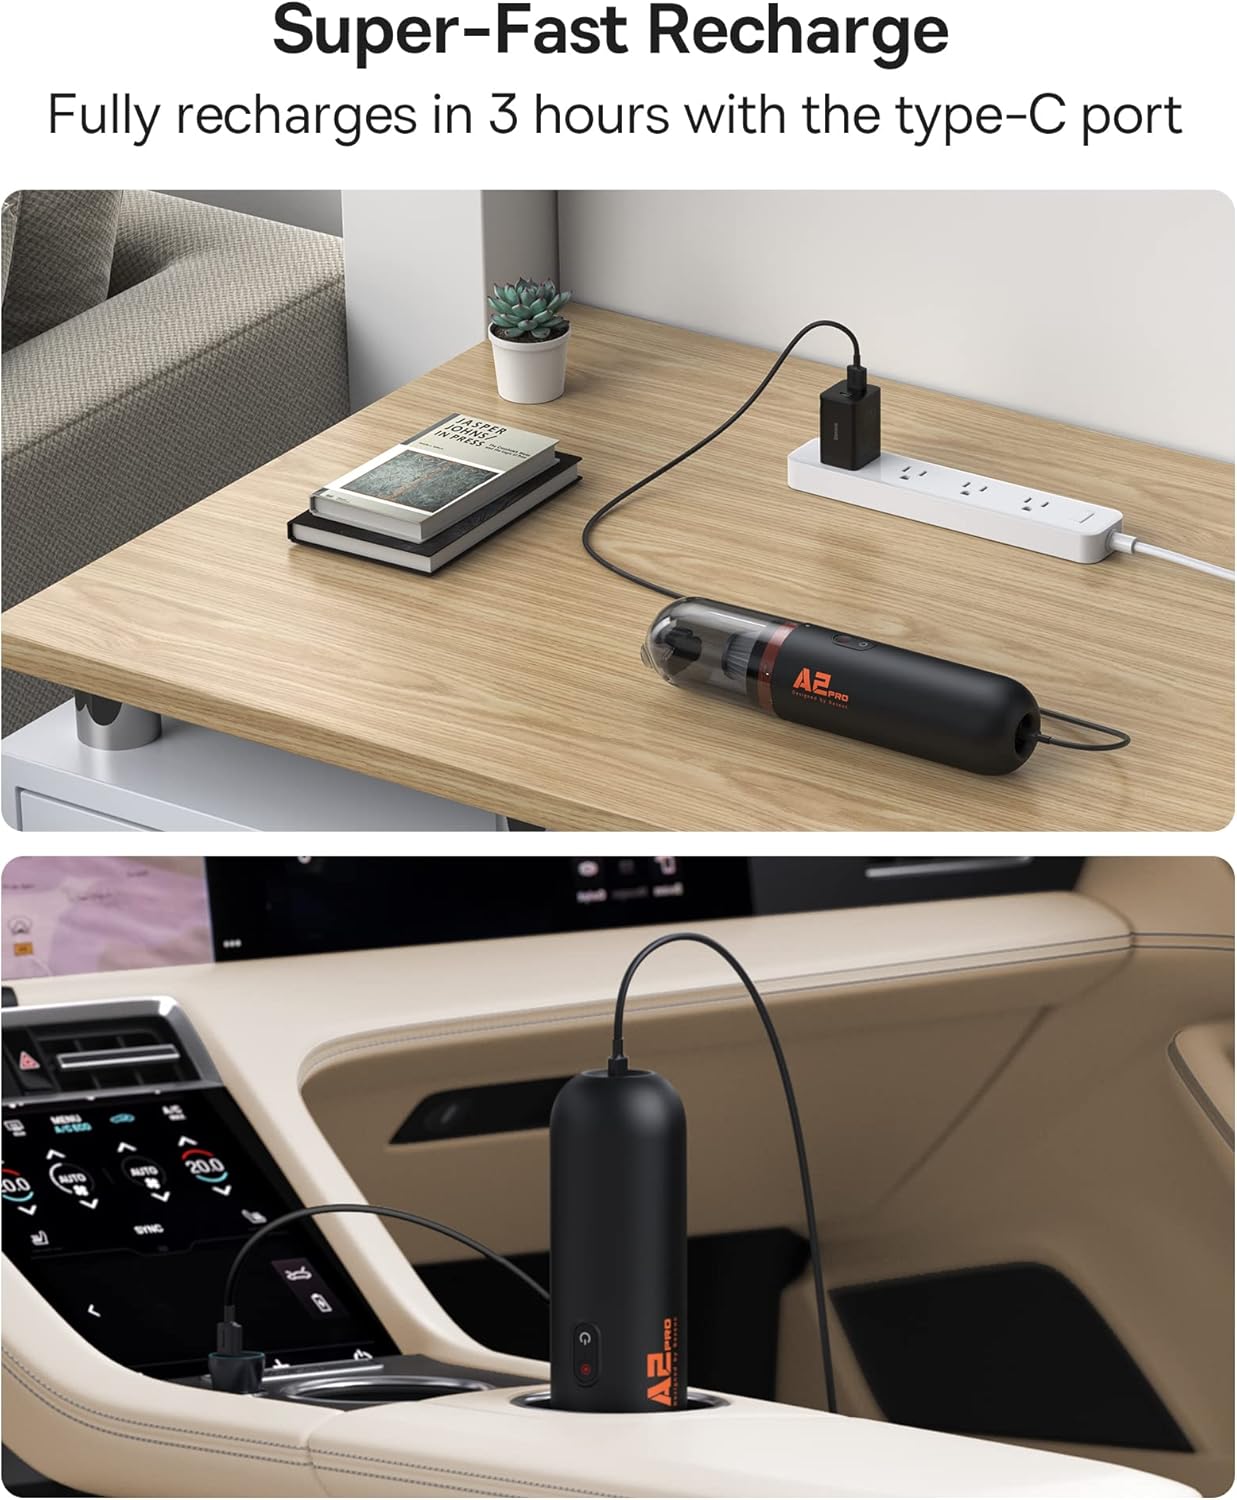
Figure 4.1: Charging the Baseus A2 Pro in different environments.
5. Telîmatên Operating
5.1 Power On / Off
Press and hold the Power Button (usually marked with a power symbol) to turn the vacuum cleaner on or off.
5.2 Rêkxistina Hêza Mijandinê
The Baseus A2 Pro features two power levels. While the vacuum is on, press the Mode Button (often located near the power button) to switch between low and high suction modes. The indicator lights will show the current power level.
5.3 Vacuuming
- Attach the 2-in-1 nozzle to the suction inlet.
- For general cleaning, use the brush attachment to agitate debris on surfaces like car seats, carpets, or keyboards.
- For tight corners, crevices, or between seats, slide the brush back to expose the crevice tool.
- Move the vacuum slowly over the area to be cleaned, ensuring the nozzle makes good contact with the surface.

Figure 5.1: Vacuuming a couch with the Baseus A2 Pro, highlighting its low noise level.

Figure 5.2: Effective cleaning of car interiors, including hard-to-reach areas.
5.4 Fonksiyona Bayê
The Baseus A2 Pro can also be used as a blower to clear dust from hard-to-reach areas.
- Remove the dust cup and any attached nozzle from the suction inlet.
- Attach the blower nozzle to the exhaust port located at the rear of the main unit.
- Turn on the vacuum cleaner and direct the airflow to blow away dust from keyboards, car vents, or other delicate surfaces.
6. Maintenance
Parastina birêkûpêk performansa çêtirîn misoger dike û temenê paqijkera weya valahiyê dirêj dike.
6.1 Valakirina Kasa Tozê
- Piştrast bikin ku valahiya paqijkerê vemirandiye.
- Qedeha tozê li dijî saetê bizivirînin da ku wê ji yekîneya sereke veqetînin.
- Bermahiyên berhevkirî bi baldarî vala bikin nav qutiya çopê.
6.2 Paqijkirina Parzûna HEPA
The HEPA filter is washable and reusable. Clean it regularly, especially when suction power decreases.
- After emptying the dust cup, remove the HEPA filter.
- Rinse the HEPA filter under running water until it is clean. Do not use detergents or hot water.
- Allow the filter to air dry completely for at least 24 hours before reinserting it into the dust cup. Ensure it is completely dry to prevent mold or damage.
- Reassemble the filter into the dust cup and attach the dust cup back to the main unit.
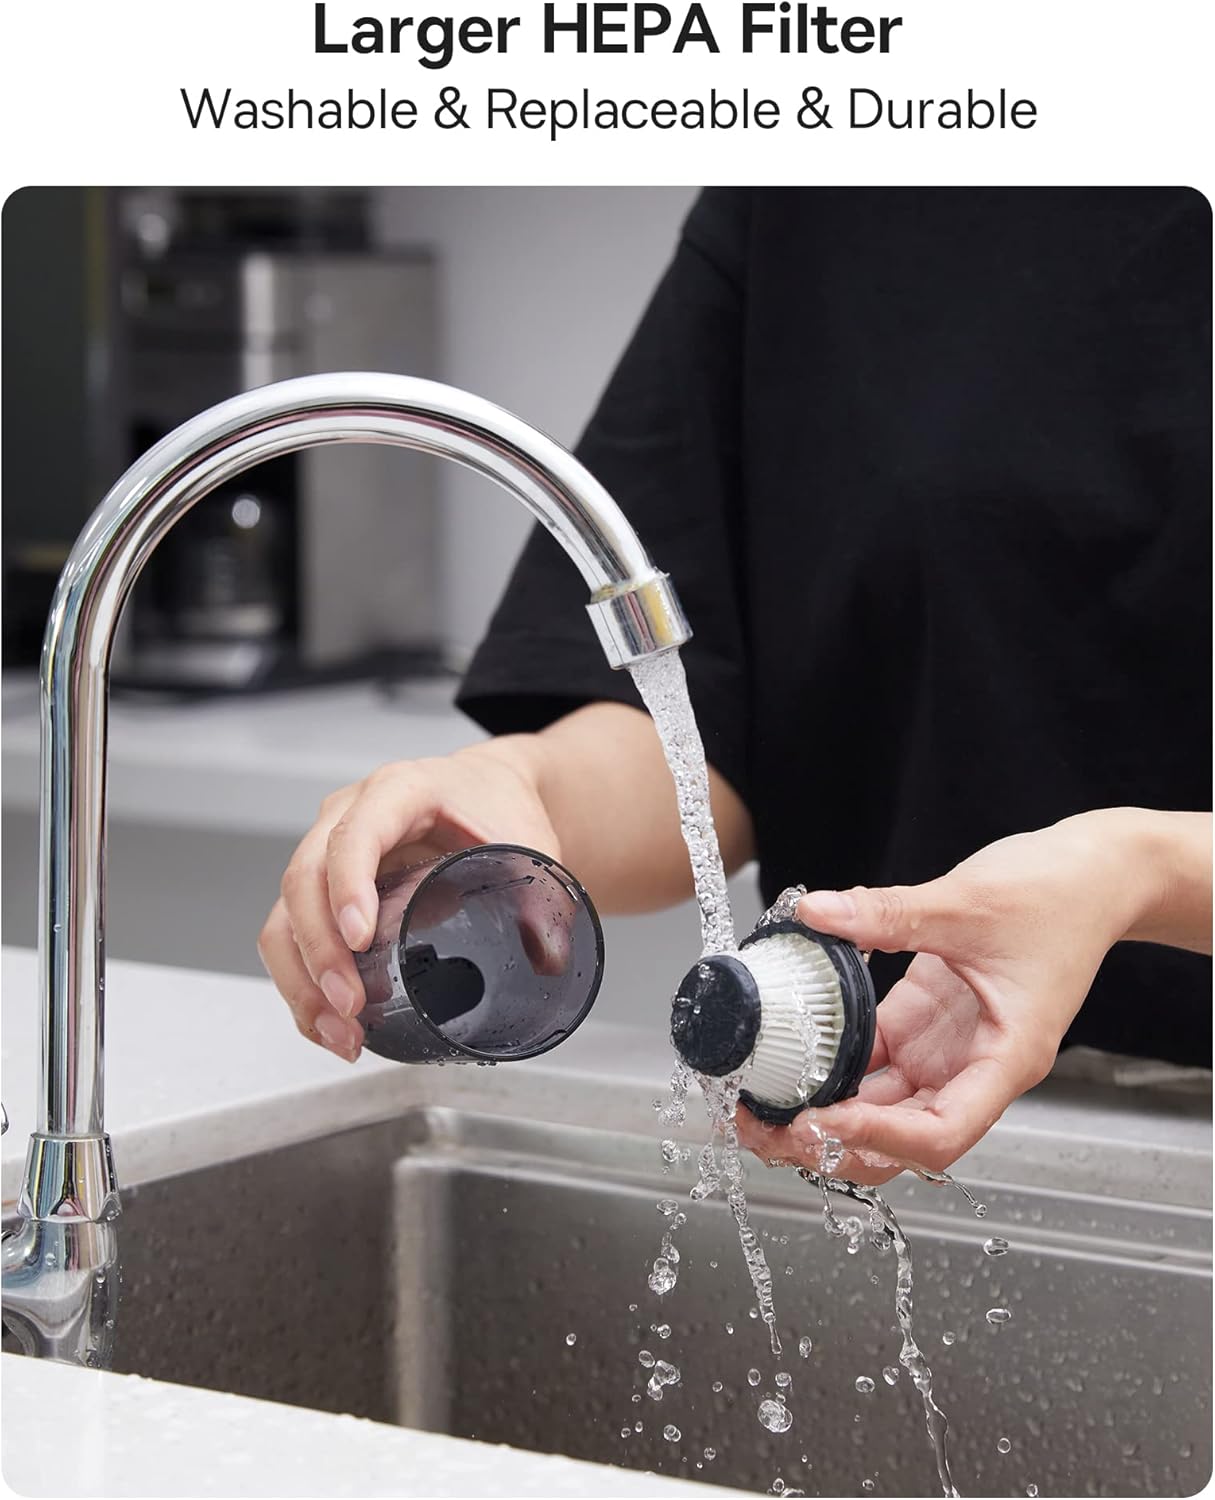
Figure 6.1: Cleaning the washable HEPA filter.
7. Destpêkirin
If you encounter any issues with your Baseus A2 Pro, refer to the following troubleshooting guide:
| Pirsegirêk | Sedema gengaz | Çare |
|---|---|---|
| Vacuum venabe | Pîl qediyaye; Bişkoka hêzê bi rêkûpêk nehatiye pêlkirin | Charge the battery fully; Press and hold the power button for 2-3 seconds. |
| Hêza şûştinê qels | Dust cup is full; Filter is clogged; Nozzle is blocked | Empty the dust cup; Clean or replace the HEPA filter; Clear any obstructions from the nozzle. |
| Ne barkirin | Charging cable or adapter is faulty; Charging port is dirty | Try a different USB-C cable and adapter; Clean the charging port gently. |
| Di dema xebatê de dengek neasayî | Obstruction in the nozzle or dust cup; Loose components | Check and clear any blockages; Ensure all components are securely assembled. |
8. Specifications
| Taybetî | Hûrî |
|---|---|
| Nîşan | Baseus |
| Navê Model | A2 Pro |
| Suction Power | 80AW |
| Noise Level | Less than 60dB (as per feature bullets) |
| Cureyê Pîl | Lîtyûm-Îyon (3*2000mAh) |
| Runtime | Nêzîkî 25-30 deqeyan |
| Time Charging | Approx. 3-4 saetan |
| Charging Port | USB-C |
| Cureyê Parzûnê | Fîltera HEPA (Dikare were şuştin) |
| Kapasîteya kasa tozê | 120 Mîlîlître |
| Babetê Weight | 1.6 Pound |
| Pîvan (L x W x H) | 2.4"D x 2.4"Fi x 10.55"Bilindahî |
9. Garantî & Piştgirî
Baseus products are manufactured to the highest quality standards. For warranty information, technical support, or any questions regarding your Baseus A2 Pro Handheld Vacuum Cleaner, please refer to the warranty card included in your package or contact Baseus customer support directly. Keep your purchase receipt as proof of purchase for warranty claims.