
1. Destpêk
Thank you for choosing the Parrot Uncle 52-inch Chandelier Ceiling Fan. This fan combines the functionality of a ceiling fan with the elegance of a crystal chandelier, designed for various indoor and covered outdoor spaces. It features a quiet, reversible motor and convenient remote control operation. This manual provides essential information for safe installation, operation, and maintenance of your new ceiling fan.
2. Agahiyên Ewlekariyê
- Berî sazkirin an tamîrkirinê, her tim elektrîkê ji şkênera devreyê qut bikin.
- Divê hemû têlkirin li gorî rêziknameyên elektrîkê yên neteweyî û herêmî bin. Heke hûn bi têlan nizanin, bi elektrîkçîyekî pispor re şêwir bikin.
- Piştrast bike ku cîhê sazkirinê dikare giraniya fanosê (bi qasî 22 pound) hilgire.
- Di dema sazkirin an paqijkirinê de ragirên kêran netewînin.
- Dema xebitandinê zarokan ji fanê dûr bigirin.
3. Naveroka pakêtê
Berî destpêkirina sazkirinê, piştrast bikin ku hemî pêkhate li wir in:
- Xanîya Motora Fanê Banê
- 5 Plywood Blades
- Crystal Light Kit
- Remote Control
- 2 Downrods (4-inch and 10-inch)
- Mounting Hardware
4. Sazkirin û Sazkirin
Professional installation is recommended for electrical wiring. Follow these general steps:
- Hêzê Vekin: Piştrast bike ku elektrîk li ser şkênera sereke qut bûye.
- Bişkojka Mountkirinê: Securely attach the mounting bracket to the ceiling junction box. This fan supports downrod mounting and can be installed on angled ceilings up to 15 degrees.
- Meclîsa Downrod: Choose the appropriate downrod (4-inch or 10-inch) for your ceiling height and assemble it with the fan motor.
- Têlkirin: Connect the fan's electrical wires to your household wiring according to the provided wiring diagram. Ensure all connections are secure.
- Pêveka Blade: Attach the 5 plywood blades to the motor housing using the provided screws.
- Crystal Light Kit Installation: Install the crystal light kit to the bottom of the fan motor.
- Sazkirina Bulb: Insert 4 E12 base bulbs (max 25 watts each, not included) into the light kit sockets.

jimar 4.1: Serview of fan components and simplified installation steps, including the powerful copper motor, plywood blades, and sparkling crystal decoration.

jimar 4.2: Detailed dimensions of the 52-inch fan and illustrations of the two mounting options: downrod mount for flat ceilings and angled mount for sloped ceilings (up to 15 degrees).
5. Telîmatên Operating
Your Parrot Uncle ceiling fan is operated via the included remote control.
5.1 Fonksiyonên Kontrola Dûr
- Leza Fan: Select from 3 available speeds (low, medium, high).
- Kontrola Ronahî: Turn the light on or off independently from the fan.
- Demjimêr: Fanê mîheng bike ku piştî 2, 4, an 8 saetan bixweber vemire.
5.2 Reversible Motor
The fan features a reversible motor for year-round comfort. A switch on the fan housing allows you to change the direction of blade rotation:
- Clockwise Rotation (Summer Mode): Bayê ber bi jêr ve diafirîne, û bandorek sarbûnê peyda dike.
- Counter-Clockwise Rotation (Winter Mode): Creates an updraft, circulating warm air throughout the room.
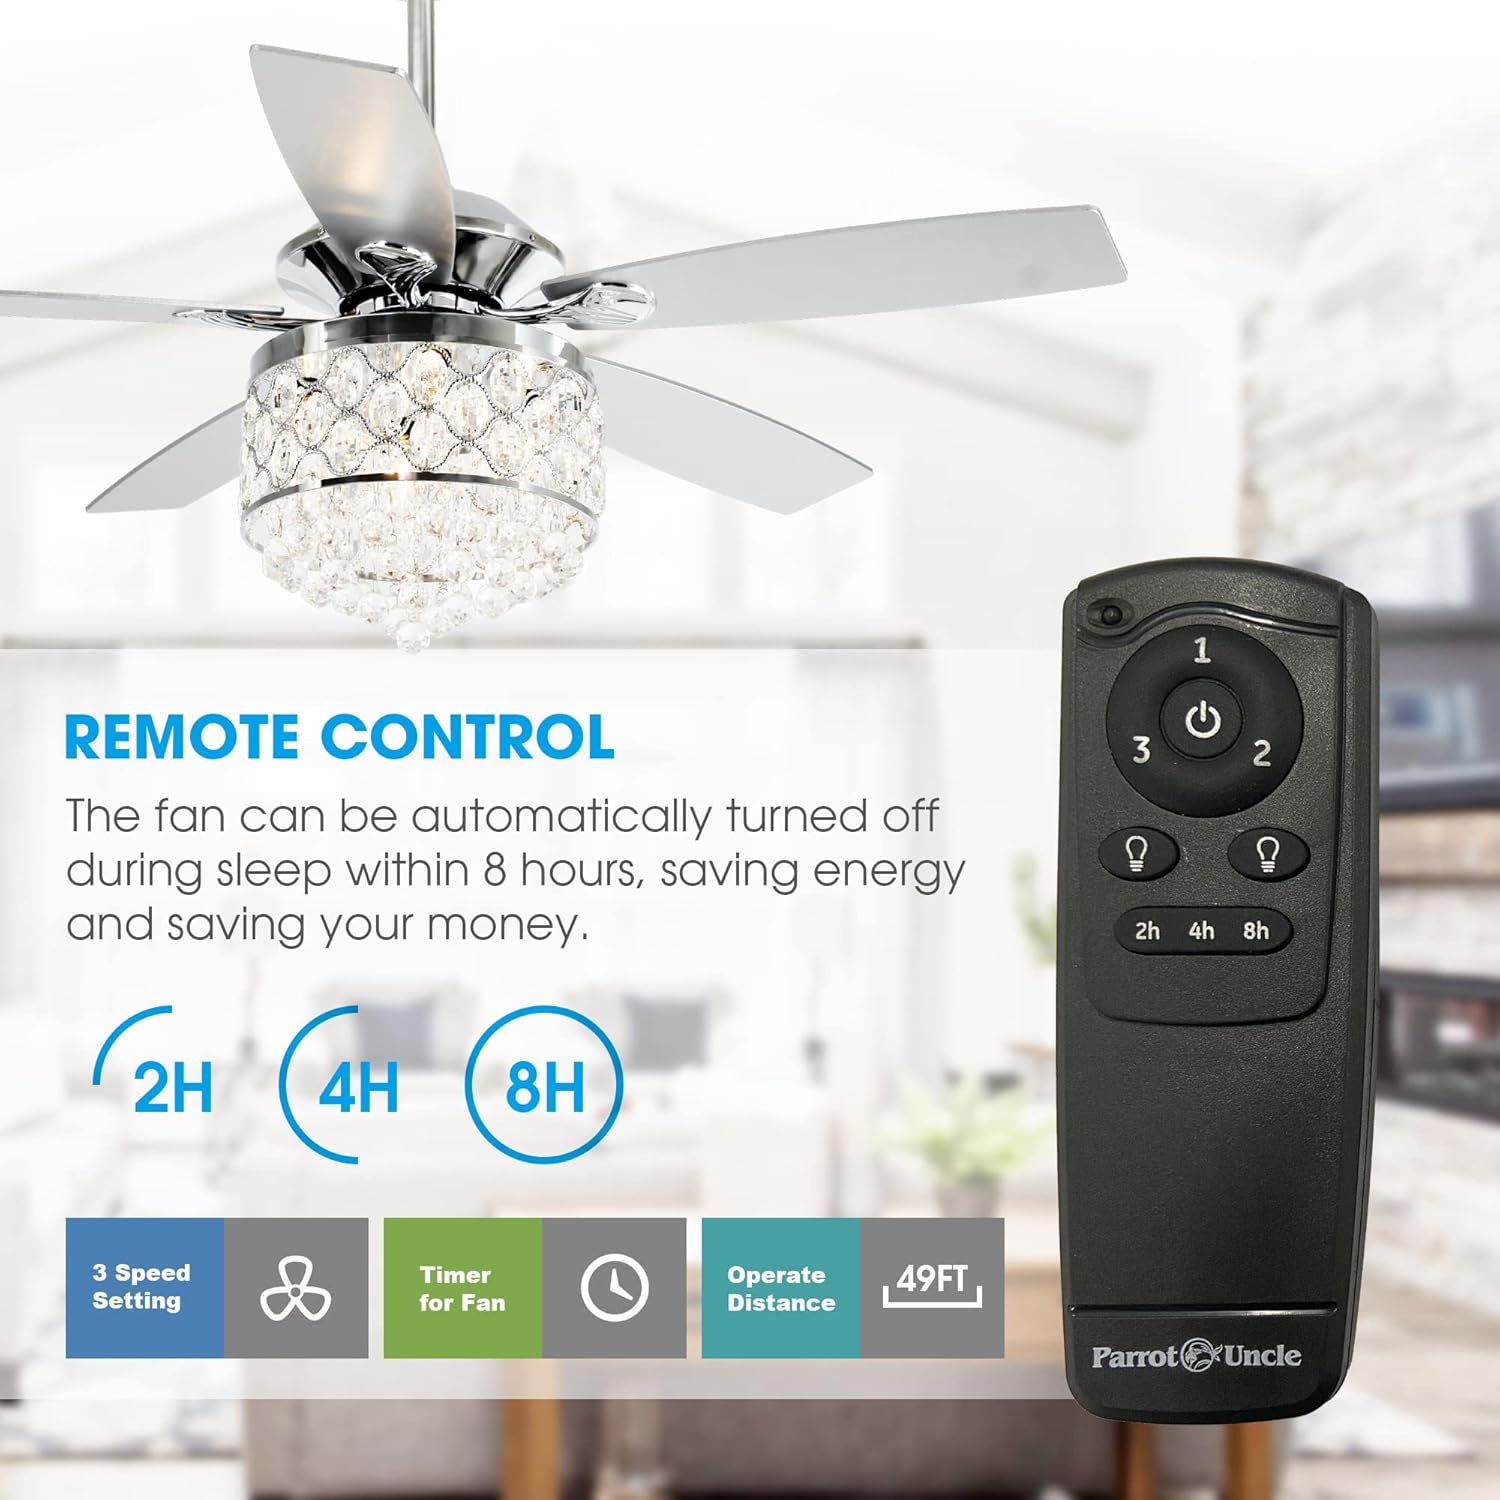
jimar 5.1: The remote control allows for adjustment of fan speed, light operation, and setting a timer for automatic shut-off.

jimar 5.2: Visual representation of the reversible motor's function, showing clockwise rotation for cooling in summer and counter-clockwise rotation for air circulation in winter.
6. Maintenance
Parastina birêkûpêk performansa çêtirîn û temendirêjiya fanê we misoger dike.
- Paqijî: Dust the blades and fan housing periodically with a soft, lint-free cloth. For the crystal light kit, gently wipe with a damp cloth and mild cleaner, then dry immediately. Do not use abrasive cleaners.
- Guhertina Bulb: When replacing bulbs, ensure the power is off. Use 4 E12 base bulbs, with a maximum wattage ji 25 watt per ampûlê.
- Pîlan hişk bikin: Ji bo rêgirtina li lerizîn an deng, hemû pêçên li ser perrên fanosê û alavên montajê bi periyodîk kontrol bikin û teng bikin.
7. Destpêkirin
Heke hûn bi pirsgirêkan re rû bi rû bimînin, li çareseriyên hevpar ên jêrîn binêrin:
| Pirsegirêk | Sedema gengaz | Çare |
|---|---|---|
| Fan dest pê nake | No power to fan; Remote control battery low/dead; Incorrect wiring. | Astengkera devreyê kontrol bike; Pîla dûrbînê biguherîne; Girêdanên têlan piştrast bike. |
| Ronahî naxebite | Bulbs loose or burnt out; Incorrect wiring. | Tighten or replace bulbs; Check light kit wiring. |
| Fan zêde dihejîne | Vîdên kêrên sist; Kêrên nehevseng; Amûrên montajê yên sist. | Tighten all blade screws; Use a balancing kit (not included); Ensure mounting bracket is secure. |
| Operasyona bi deng | Loose screws; Motor issues. | Check and tighten all screws; If noise persists, contact customer service. |
For issues not listed or if problems persist, please contact Parrot Uncle customer service.
8. Specifications
| Taybetî | Hûrî |
|---|---|
| Nîşan | Apê Parrot |
| Hejmara Model | F6218FD |
| Mezinayî | 52 Inches |
| Mezinahiya Hilberê | 52"D x 52"Fi x 28.3"Bilindahî |
| Reng | Chrome |
| Mal | Engineered Wood, Glass, Iron |
| Tîpa Çavkaniya Ronahî | Incandescent (E12 base) |
| Hejmara Çavkaniyên Ronahî | 4 |
| Max Wattage (ji bo her ampûlekê) | 25 watt |
| Rêbaza Kontrolê | Remote Control |
| Taybetmendiyên Taybet | Remote Controlled, Reversible Motor, Timer |
| Bikaranîna hundur / Derveyî | Indoor (Covered Patios) |
| Babetê Weight | 22 Pound |
9. Garantî û Piştgirî
Parrot Uncle offers a 30-day return and replacement service for this product. Additionally, lifetime professional customer service is provided to assist with any questions or concerns you may have regarding your ceiling fan.
For support, please refer to the contact information provided with your purchase or visit the official Parrot Uncle website.