Pêşkêş
This instruction manual provides detailed guidance for assembling and maintaining your Revell of Germany Tiger II Ausf.B (Henschel Turret) plastic model kit. This 1:35 scale model offers an engaging building experience for enthusiasts aged 16 years and older. The kit features an extensively modeled chassis, easy-to-mount tracks, a rotating turret, an elevating gun, and hatches that can be positioned open or closed. Two sets of decals are included for customization.
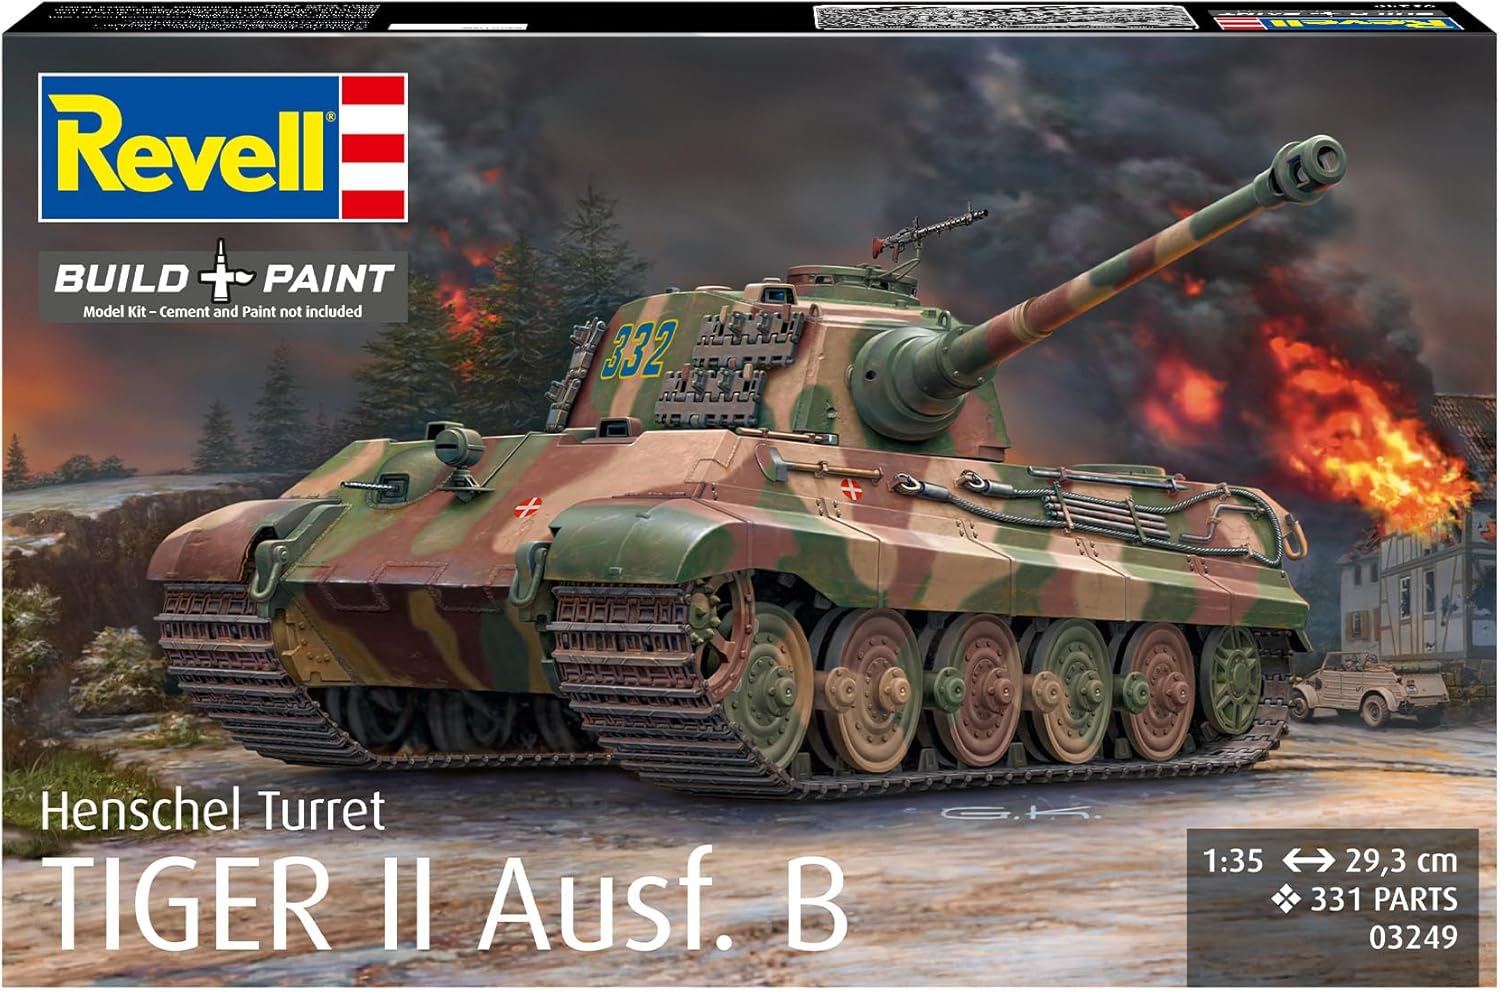
Wêne: Pêşî view of the Revell Tiger II Ausf.B (Henschel Turret) model kit box, displaying the assembled tank with camouflage and the Revell logo.
Sazkirin û Amadekirin
Before beginning assembly, ensure you have a clean, well-lit workspace. This kit contains 250 small plastic parts and requires additional materials for completion. Cement and paint are not included in this kit and must be purchased separately. Review all parts and the included paper instructions thoroughly before starting.
Amûr û Materyalên Pêwîst (Ne Tê de ne):
- Plastic model cement or glue
- Çakûçê hobî an jî makîneyên birrîna kêrê
- Biçûk files or sandpaper for cleaning parts
- Paints (acrylic or enamel, as recommended by Revell for military models)
- Firçeyên boyaxkirinê an firçeya hewayî
- Tweezers for small parts

Image: Various plastic sprues containing the unassembled parts of the Revell Tiger II Ausf.B model kit, laid out on a surface.

Image: Back of the Revell Tiger II Ausf.B model kit box, showing various assembled views, recommended paint colors, and skill level indicators.
Talîmatên Meclîsa
Follow the step-by-step instructions provided in the physical manual included with your kit. The assembly process typically involves cutting parts from the sprues, cleaning any excess plastic (flash), gluing parts together, and applying paint and decals.
Taybetmendiyên sereke yên montajê:
- Chassis: Extensively modeled chassis with torsion bar suspension details.
- Tracks: Easy-to-mount track sections for realistic appearance.
- Turret: Rotating Henschel turret with an elevating 88mm gun.
- Hatches: Hatches can be assembled in either open or closed positions.
- Biryara Two sets of decals are provided for various marking options.

Wêne: Nêzîk view of the upper hull of the assembled Revell Tiger II Ausf.B model, showing intricate details and camouflage paint scheme.

Wêne: Ji jor ber bi jêr ve view of the Henschel turret on the assembled Revell Tiger II Ausf.B model, highlighting the gun barrel, commander's cupola, and turret details.
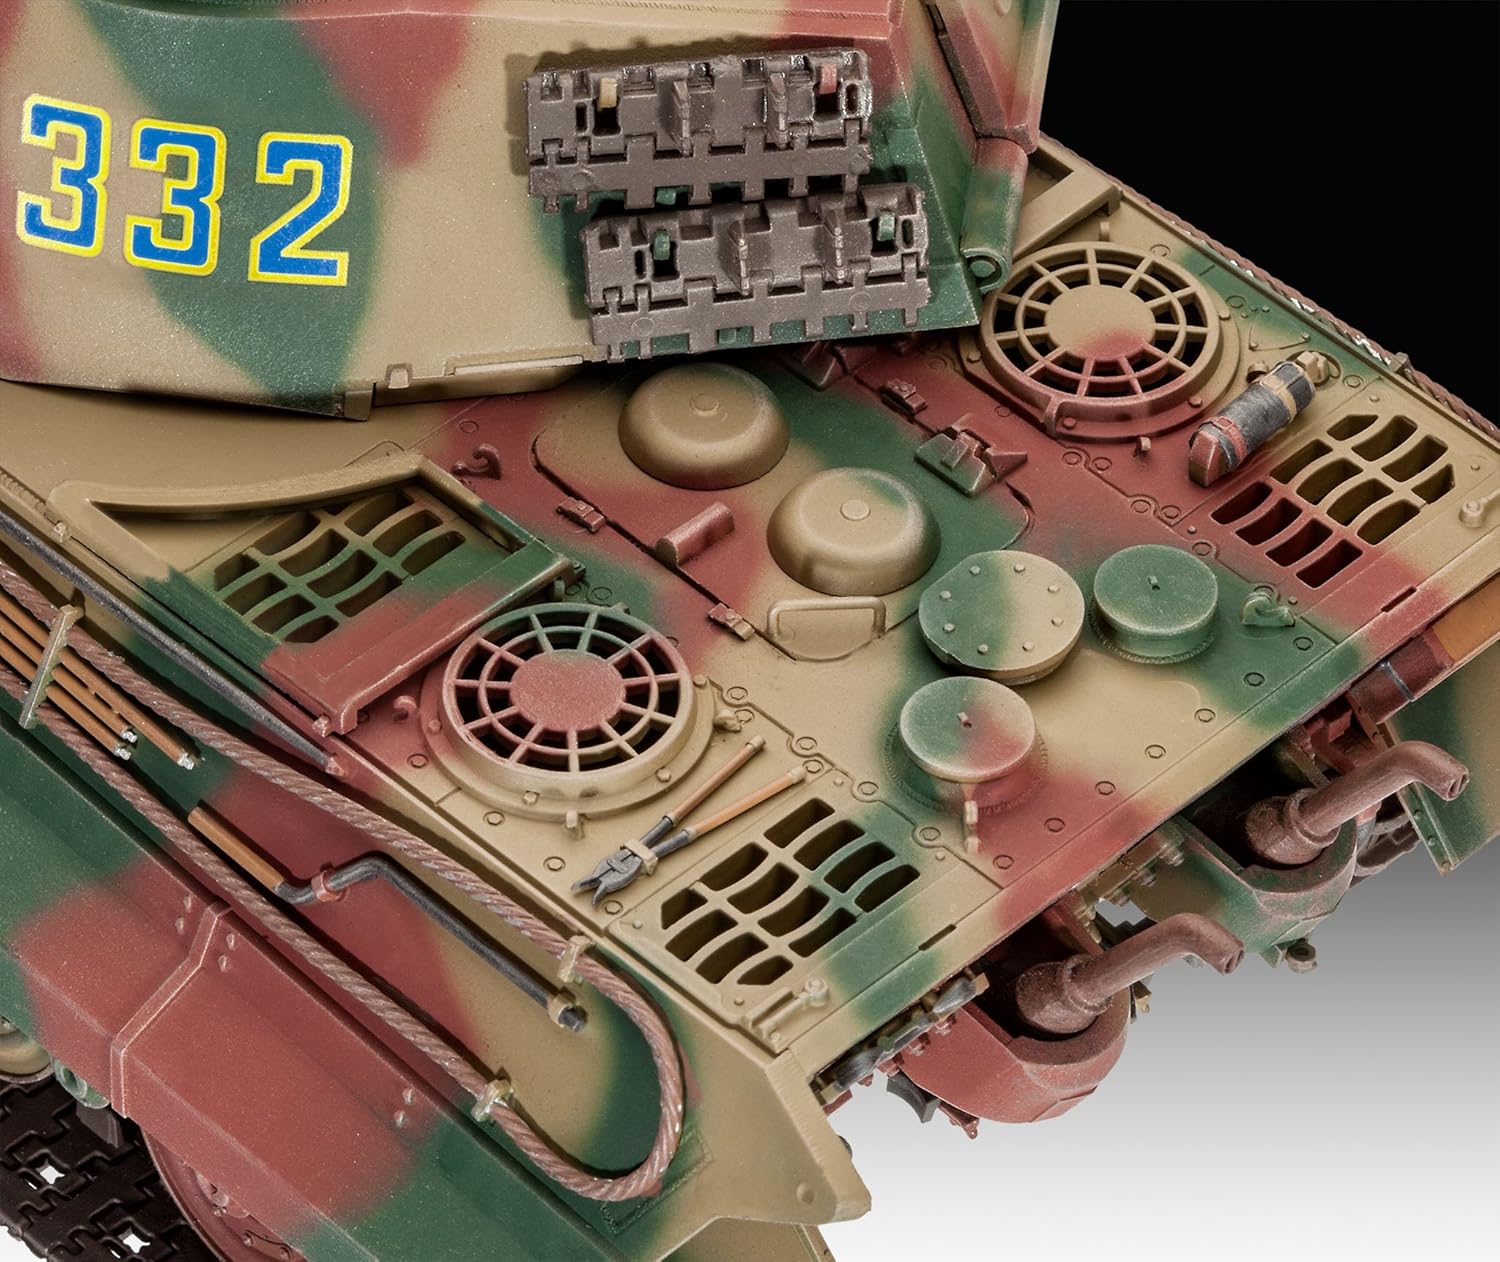
Image: Rear-top view of the assembled Revell Tiger II Ausf.B model, showing the engine deck grilles, exhaust pipes, and various tools mounted on the hull.

Wêne: Alî view of the assembled Revell Tiger II Ausf.B model, showcasing the detailed tracks, road wheels, and side skirts.
Display and Handling
Once assembled and painted, your Revell Tiger II model is designed for display. Handle the model with care to prevent damage to delicate parts. The turret is designed to rotate, and the main gun can be elevated, allowing for dynamic display options.
- Avoid dropping the model.
- Do not apply excessive force to movable parts.
- Display in a stable location away from direct sunlight or extreme temperatures.
Lênerrînî
To keep your model in optimal condition, occasional cleaning is recommended.
- Paqijkirin: Use a soft brush or a can of compressed air to gently remove dust.
- Paqijî: Ji bo qirêjiya bêtir serhişk, bi sivikî bişon.ampen a soft cloth with water (avoiding harsh chemicals) and gently wipe the surface. Ensure the cloth is not dripping wet.
- Embarkirinî: If storing the model, place it in a protective container to prevent dust accumulation and accidental damage.
Troubleshooting (Assembly)
While assembling your model, you might encounter common issues. Here are some tips:
- Parts not fitting: Ensure you have the correct parts for the step. Check for excess plastic (flash) on the edges of parts and carefully remove it with a hobby knife or file.
- Glue issues: Use plastic model cement sparingly. Too much glue can melt the plastic or leave unsightly marks. Allow sufficient drying time for each joint.
- Decal application: Ensure the surface is clean and smooth. Use decal setting solutions for better adhesion and to conform decals to irregular surfaces.
- Parçeyên winda: Double-check the sprues and the box. If a part is genuinely missing, contact Revell customer support.
Specifications
| Taybetî | Hûrî |
|---|---|
| Nîşan | Revell |
| Navê Model | Tiger II Ausf.B (Henschel Turret) |
| Hejmara Model | 80-3249 |
| Scale | 1:35 |
| Cureyê materyalê | Pîlastîk |
| Hejmara Pieces | 250 |
| Mezinahiya Babetê (L x W x H) | 11.54 x 4.72 x 4.33 inches (29.3 x 12.0 x 11.0 cm approx. for assembled model) |
| Babetê Weight | 0.2 Kilograms (approx. for kit components) |
| Rêzeya Temenê Pêşniyarkirî | 16 years to 80 years (192 months to 960 months) |
| Pêkhateyên Tê de | Revell Germany Tiger II Ausf.B (Henschel Turret) plastic parts, decals |
| Taybetmendiyên Additional | Height-adjustable cannon, rotating tower |
Agahî Garantî
This product is sold without an explicit manufacturer's warranty. Please refer to the retailer's return policy for any issues with the kit upon receipt.
Piştgiriya Mişterî
For further assistance or inquiries regarding Revell products, please visit the official Revell store or contact their customer service directly.
Revell Store: Visit the Revell Store on Amazon