1. Destpêk
The Aero-Stream AS-R50 Septic Tank Riser Kit is designed to provide convenient ground-level access to your septic tank for inspections and maintenance. This kit helps prevent the deterioration of concrete risers caused by hydrogen sulfide gas, ensuring long-lasting performance. Made from rugged High Density Polyethylene (HDPE), the components are engineered for reliable, all-weather use. The kit includes all necessary hardware for installation, making it a straightforward DIY project.
2. Components Included
The Aero-Stream AS-R50 Septic Tank Riser Kit comes complete with the following components:
- Base Flange with Safety Barrier
- Corrugated Pipe (23.5 inch ID x 50 inch Tall)
- Premium Low Profile Lihêv
- Hardware (stainless steel screws, TapCon screws)
- Butyl Sealant Rope
- Guide Instruction
Wêne 1: Teqîn view of the Aero-Stream Septic Tank Riser Kit components, including the cover, corrugated pipe, safety barrier, and base flange.
3. Amûrên Pêdivî ye
To install your Aero-Stream Septic Tank Riser Kit, you will need the following tools:
- Drill / ajokerê elektrîkê
- #2 Bit Phillips
- 5/32" masonry bit
- kêrê Utility
- Bêr
- Tarps
- Bûçikê bihejînin
- Gloves
- Qedehên ewlehiyê
- Sledgehammer (if removing existing concrete riser)
4. Telîmatên Sazkirinê
Follow these step-by-step instructions to properly install your Aero-Stream AS-R50 Septic Tank Riser Kit. Always wear appropriate safety gear, including gloves and safety glasses, during installation.
4.1. Amadekirin
- Locate Septic Tank Access: Identify the existing access points to your septic tank.
- Herêmê Paqij bikin: Dig down to the top of the septic tank cover. Use tarps to collect excavated dirt, which will make it easier to replace later.
- Remove Existing Riser (if applicable): If replacing an old concrete riser, carefully remove it using a sledgehammer. Wear safety glasses to protect against debris. Sweep any dust and debris away from the tank opening.
Video 1: Step-by-step guide on how to install Aero-Stream septic tank risers, including preparation and assembly.
4.2. Assembling the Riser
- Apply Butyl Sealant to Adaptor Flange: With the white tape upward, apply the butyl sealant rope around the perimeter of the adaptor flange. Butt the ends of the butyl rope to ensure a watertight seal. Remove the white tape and knead the ends of the butyl rope for a tight fit.
- Attach Riser Pipe to Adaptor Flange: With the four predrilled holes upward, center the riser pipe on the adaptor flange. When an even gap is achieved, lower the riser pipe onto the rope. Apply firm downward pressure all around the riser pipe.
- Secure Riser Pipe: Install six screws to attach the riser pipe to the adaptor flange. There will be approximately a 1/4-inch gap between the riser flange and pipe.
Wêne 2: Teqîn view of the riser components, illustrating how they fit together during assembly.
4.3. Installing the Riser onto the Tank
- Position the Riser: Center the assembled riser on the tank clean-out opening. Apply pressure around the perimeter to compress the sealant between the tank and the adaptor flange.
- Kulên Mountkirina Drill: Drill four 5/32-inch diameter holes through the four corners of the adaptor flange, at least 1 3/4 inches deep into the tank cover.
- Fasten Base Plate: Fasten the base plate to the tank using the four enclosed blue screws.
4.4. Installing Upper Riser Ring and Safety Barrier
- Apply Butyl Sealant to Upper Riser Ring: To install the upper riser ring, apply the butyl sealant rope around the perimeter of the riser pipe. Knead the ends together to ensure a water-tight seal. Apply pressure around the perimeter.
- Secure Upper Riser Ring: Install six screws to attach the riser pipe to the upper riser pipe. Allow a 1/4-inch gap between the adaptor flange and riser pipe to install the safety barrier.
- Insert Safety Barrier: Locate the six mounting slots on the safety barrier. Insert the safety barrier into the riser. Align the six mounting slots with the six screws. Apply slight downward pressure and rotate the barrier clockwise. Pull upward; it must not dislodge.
- Store Instruction Guide: Place the Instruction Guide in the plastic pouch and ensure it is attached to the safety barrier so service personnel know how to re-install the safety barrier.

Figure 3: The safety barrier provides an additional layer of protection within the riser.
4.5. Gavên Dawî
- Berxê ewle bikin: Secure the riser cover to the pipe with four cover security screws. Secure the riser like you would the lugs on a tire - start part way and then tighten.
- Dagirkirin: Carefully backfill the excavated area around the riser, ensuring the cover remains accessible at ground level.

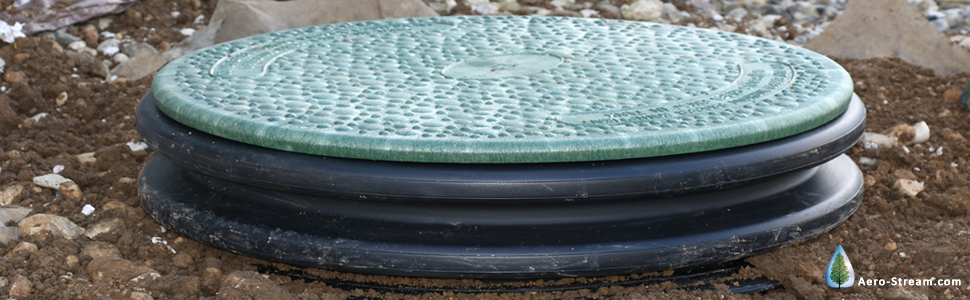
Figure 4: The Aero-Stream riser installed, providing easy access at ground level.
5. Specifications
| Taybetî | Hûrî |
|---|---|
| Çêker | Aero-Stream |
| Hejmara Part | 102364 |
| Mezinahiya Hilberê | 30.25 x 30.25 x 50 inches |
| Hejmara Modela Babetê | 102364 |
| Awayî | 23.5 in. ID x 50 in. Tall |
| Mal | Polîetîlenê Density Bilind (HDPE) |
| Hejmara Pakêta Babetê | 1 |
| Pêkhateyên Tê de | Base Flange with Safety Barrier, Corrugated Pipe, Cover, Hardware, Sealant |
6. Agahdariya Garantiyê
The Aero-Stream AS-R50 Septic Tank Riser Kit comes with a 1 Garantî Sal. For specific details regarding warranty claims and coverage, please contact Aero-Stream, LLC directly.
7. Piştgiriya Mişterî
If you have any questions regarding the installation, operation, or maintenance of your Aero-Stream Septic Tank Riser Kit, please do not hesitate to contact Aero-Stream, LLC customer support.
Têkelî: Aero-Stream, LLC
Telefon: (877) 254-7093
Webmalper: www.aero-stream.com