
1. Destpêk
This manual provides essential information for the proper setup, operation, and maintenance of your Sony SLV-FT5 VHS Video Cassette Recorder (VCR). Please read these instructions thoroughly before using the unit to ensure optimal performance and safety.
2. Agahiyên Ewlekariyê
Dema ku hûn vê hilberê bikar tînin, her gav tedbîrên ewlehiyê yên bingehîn bişopînin da ku xetera agir, şoka elektrîkê û birîndarbûnê kêm bikin.
- Yekîneyê li ber baran an şilê nehêle.
- Kabîneyê venekin. Xizmetkirinê tenê ji personelên pispor re bişînin.
- Hewakirina baş misoger bikin; deriyên hewakirinê negirin.
- Tenê dabînkirina elektrîkê ya ku ji bo vê yekîneyê hatî destnîşankirin bikar bînin.
- Yekîneyê ji çavkaniyên germê û tîrêjên tavê yên rasterast dûr bigirin.
3. Sazkirin
3.1 Vekirin
Carefully remove the VCR and all accessories from the packaging. Verify that all components are present: the SLV-FT5 VCR unit, remote control, and necessary connection cables (e.g., RCA audio/video cables).
3.2 Girêdana bi Televîzyonê re
To connect the VCR to your television, use the provided RCA audio/video cables. Match the colored plugs to the corresponding colored jacks on both the VCR and your TV (Yellow for Video, White for Left Audio, Red for Right Audio).

jimar 1: Rear panel of the Sony SLV-FT5 VCR. This image displays the various input and output ports, including RCA jacks for audio and video, and the power input. The product label with model number SLV-FT5 and power specifications (100V 18W 50/60Hz) is also visible.
3.3 Girêdana Hêzê
Plug the VCR's power cord into a standard electrical outlet (AC 100V, 50/60Hz). Ensure the power outlet is easily accessible.
3.4 Setup Control Remote
Open the battery compartment on the back of the remote control and insert two AA batteries, observing the correct polarity (+/-). Close the compartment securely.

jimar 2: The Sony RMT-V219 remote control, designed for the SLV-FT5 VCR. This image also shows the included RCA audio/video cables, which are typically used for connecting the VCR to a television.
4. Operating the VCR
4.1 Hêzdarkirin/Off
Bitikîne ERK button on the VCR's front panel or the remote control to turn the unit on or off.
4.2 Loading and Unloading a VHS Tape
- Barkirin: Insert a VHS cassette into the tape slot on the front of the VCR with the tape window facing forward. The VCR will automatically pull the tape in.
- Daxistin: Bitikîne DERVEAVÊTIN button on the VCR or remote control. The tape will be ejected.
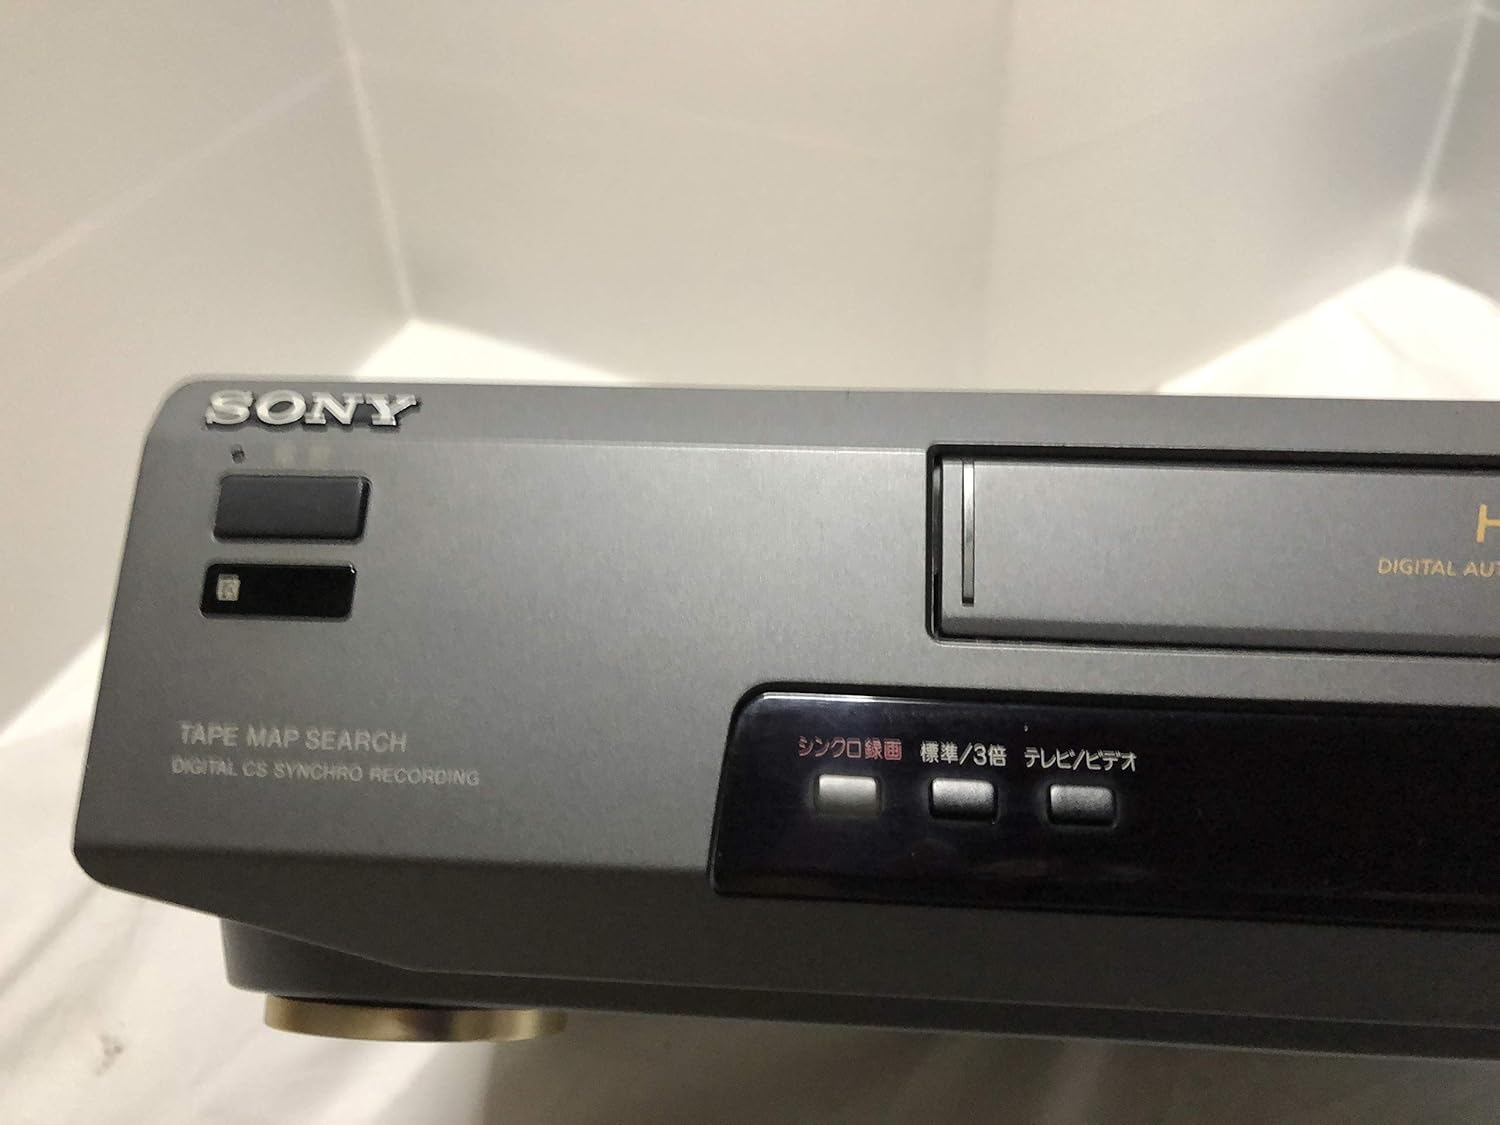
jimar 3: Front left section of the Sony SLV-FT5 VCR. This view highlights the tape loading slot and the 'TAPE MAP SEARCH' feature, which assists in navigating recorded content on a tape.
4.3 Playback
After loading a tape, press the BAZÎ button (►) on the VCR or remote control to begin playback. Use the MIZDAN (∥), RAWESTAN (■), ŞÛNDELÊGERANDIN (◀◀), and FAST PÊŞ (►►) buttons to control playback.

jimar 4: Front right section of the Sony SLV-FT5 VCR. This image displays the main playback controls (Play, Stop, Rewind, Fast Forward, Pause) and additional buttons for 'Quick Timer' and 'Tracking' adjustments.
4.4 Tomarkirin
To record, ensure a blank or recordable tape is inserted. Select the desired input source (e.g., TV channel). Press the REC (●) button on the VCR or remote control. Press RAWESTAN (■) to end recording.
4.5 Tracking Adjustment
If the picture quality during playback is poor (e.g., horizontal lines or noise), use the ŞOPANDIN buttons on the front panel or remote control to fine-tune the tape's alignment with the VCR's heads.
5. Maintenance
5.1 Paqijkirina Yekîneyê
Wipe the exterior of the VCR with a soft, dry cloth. For stubborn stains, use a cloth lightly dampbi çareseriyeke deterjanê ya nerm were paqijkirin, paşê hişk bibe. Paqijker an çareserkerên aşınker bikar neynin.
5.2 Paqijkirina Serî
Over time, VCR heads can accumulate dirt, leading to poor picture and sound quality. Use a commercially available dry-type VHS head cleaning cassette according to its instructions. Avoid wet-type cleaners as they can damage the heads.
5.3 Storage
When not in use for extended periods, disconnect the VCR from the power outlet. Store the unit in a cool, dry place, away from dust and direct sunlight.
6. Destpêkirin
If you encounter issues with your VCR, refer to the following common problems and solutions before seeking professional service.
| Pirsegirêk | Sedema gengaz | Çare |
|---|---|---|
| Hêz tune | Kabloya elektrîkê qut bûye; pirsgirêkek priza elektrîkê heye | Girêdana kabloya elektrîkê kontrol bikin; prizek cûda biceribînin. |
| Wêne/deng tune | Incorrect TV input; loose A/V cables | Select correct TV input (e.g., Video 1, AV); ensure A/V cables are securely connected. |
| Poor picture quality (snowy, lines) | Dirty VCR heads; tracking issue; old/damaged tape | Clean VCR heads; adjust tracking; try a different tape. |
| Kaset dernakeve | Power issue; mechanical malfunction | Ensure power is on; try pressing EJECT multiple times. If issue persists, seek service. |
| Kontrola ji dûr ve naxebite | Dead batteries; obstructed sensor | Replace batteries; ensure no obstacles between remote and VCR sensor. |
7. Specifications
| Taybetî | Specification |
|---|---|
| Nîşan | Sony |
| Hejmara Model | SLV-FT5 |
| Type Media | VHS |
| Resolution | 720 x 480 pixel |
| Giraniya hilberê | 4160 gram |
| Mode Output Audio | Dûdeng |
| Formatên Dengê piştgirî kirin | Monaural, Stereo |
| Şîfrekirina Vîdyoyê | Analog |
| Amûrên Lihevhatî | Televîzyon |
| Lihevhatina Vîdyoya Têketinê | NTSC |
| Pêdiviyên Hêzê | 100V, 18W, 50/60Hz |
8. Garantî û Piştgirî
For warranty information and customer support, please refer to the documentation included with your purchase or visit the official Sony webmalper. Delîla kirîna xwe ji bo îdiayên garantiyê biparêzin.